
A Guide to ISMRM’s
Abstract Submission Process
Be sure to read the Synopsis & Impact Guide in addition to this page.
If you are reading this, you are likely preparing your first ISMRM abstract using the HTML submission system. This process should be rather straightforward, but we would like to walk you through this step by step.
The best way to prepare your abstract for submission is to first write and organize your text in any common text editor (e.g. Microsoft Word, iWorks or even vi) without any special formatting.
There is a 750-word limit for the total abstract length. Please note that this number only includes the body of the text and does not include references, acknowledgements, synopsis or figure captions, which have their own limits. You will also need a synopsis of up to 100 words that will be added later in the submission process together with a 40-word impact statement. Each abstract can have up to 5 figures, and each figure caption is limited to 500 characters. An additional high-level “preview” figure is included for the program. There is no limit to the format of the figures except that they must be less than 2MB in size. The figures will be viewed in a web browser, so zooming and panning should be possible as implemented by the reader’s browser. Please note that both the preview figure and the acknowledgement sections will appear on the preview and on the final abstract, but will not appear during the review process.
Start your submission entry as soon as possible! It is not a fast process, and leaving it until the last minute can result in your abstract missing the deadline.
Remember, you can go back and edit your submission until the deadline, so enter what you have as soon as you can.
The deadline is 06 November 2024 at 23:59 UTC.
There will be NO extensions.
Text & Figure Limits
- Title: 125 characters
- Synopsis: 100 words (combined 4 sections)
- Impact: 40 words
- Body of the Abstract: 750 words (references not included)
- Preview Figure: 1 figure, no caption, viewable at the width of a mobile smartphone
- Figures: up to 5 only for abstract
- Figure Captions: 500 characters per caption
Step-by-Step Instructions
Click any image below to expand.
Step 1: Create a NEW Account
On the left side of the submission site’s login page, click “New to this site?” to create a new account. Accounts from past years will not work on this meeting’s submission site.

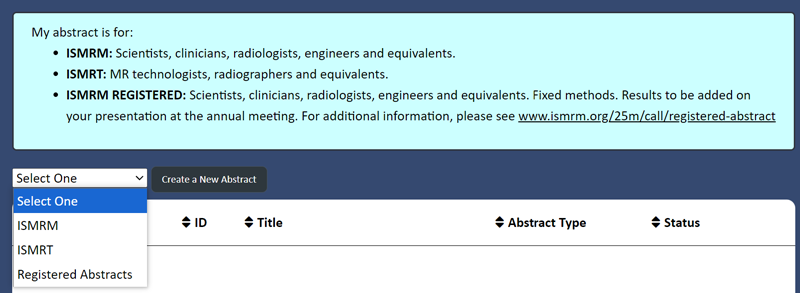
On the next page, select the appropriate society and then click the “Create a New Abstract” button. A new abstract ID will be created for each submission.
Be sure to select ISMRM from the drop-down!
Selecting the wrong option here can result in your abstract being rejected simply by being reviewed by the wrong reviewers!
On the top of the page you will see a row of circles marked 1-8. You can click these to switch back or forth to edit the information on each page.

Step 2: Add Authors
We recommend you start entering authors early, even before your abstract is ready to submit! Be sure to verify with your co-authors how they want their name and institution to appear on the abstract, and make sure you have their preferred email address entered correctly.
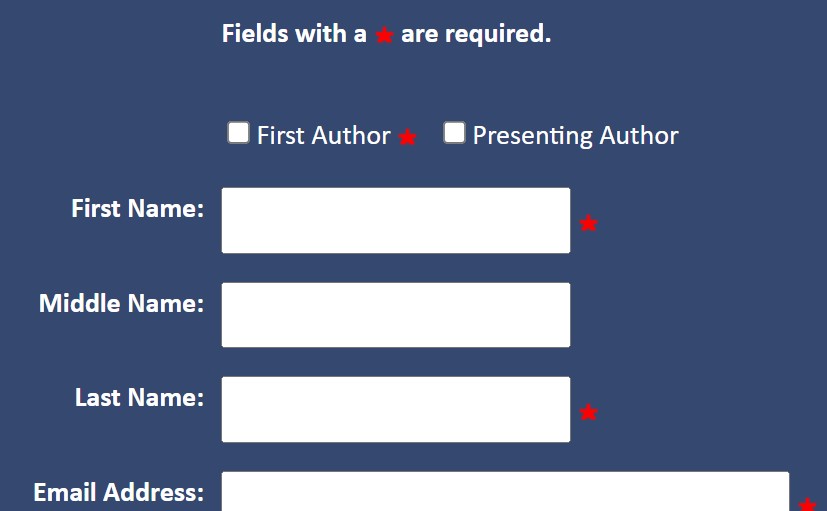
Be sure to identify the First Author and check the relevant box. The First Author is also the corresponding author. Please fill in all fields marked with a red asterisk: *
We encourage you to complete the optional fields for pronouns and phonetic pronunciation of surnames.
Step 3: Enter Synopsis, Impact and Preview Figure
The Synopsis and Impact sections are to convey a high-level description of the project in a consistent, specific manner to the community. The synopsis is a 100-word high-level but specific summary of the motivation, goal, approach and results, which is followed by a 40-word impact statement. There is no need to duplicate text between these, except that the impact statement will appear alone on digital slides that point people to digital posters. Think of both the impact statement and the combination of synopsis and impact statement as a sort of “sales pitch” for people browsing the slides to click on your abstract.
The synopsis consists of four text boxes, for motivation, goal, approach and results. The 100-word limit applies to the total in these boxes. The impact box has a separate 40-word limit. Since both will be included with your abstract, you should use the synopsis/impact for the high-level description for a broad audience. Then provide a more detailed introduction in your main abstract, which is written more for the audience in your area of research.
Your Preview Figure (thumbnail) will only appear on program session pages and on preview/teaser pages. It is not part of the abstract review. This figure:
- Should be a simple & uncluttered representation of your work.
- Does not have a caption, nor should it have small text within the image.
- Is legible at small sizes, especially on mobile devices.
- Will be visible to the public on session pages.
Please read the Synopsis & Impact Guide.
Step 4: Enter your Abstract
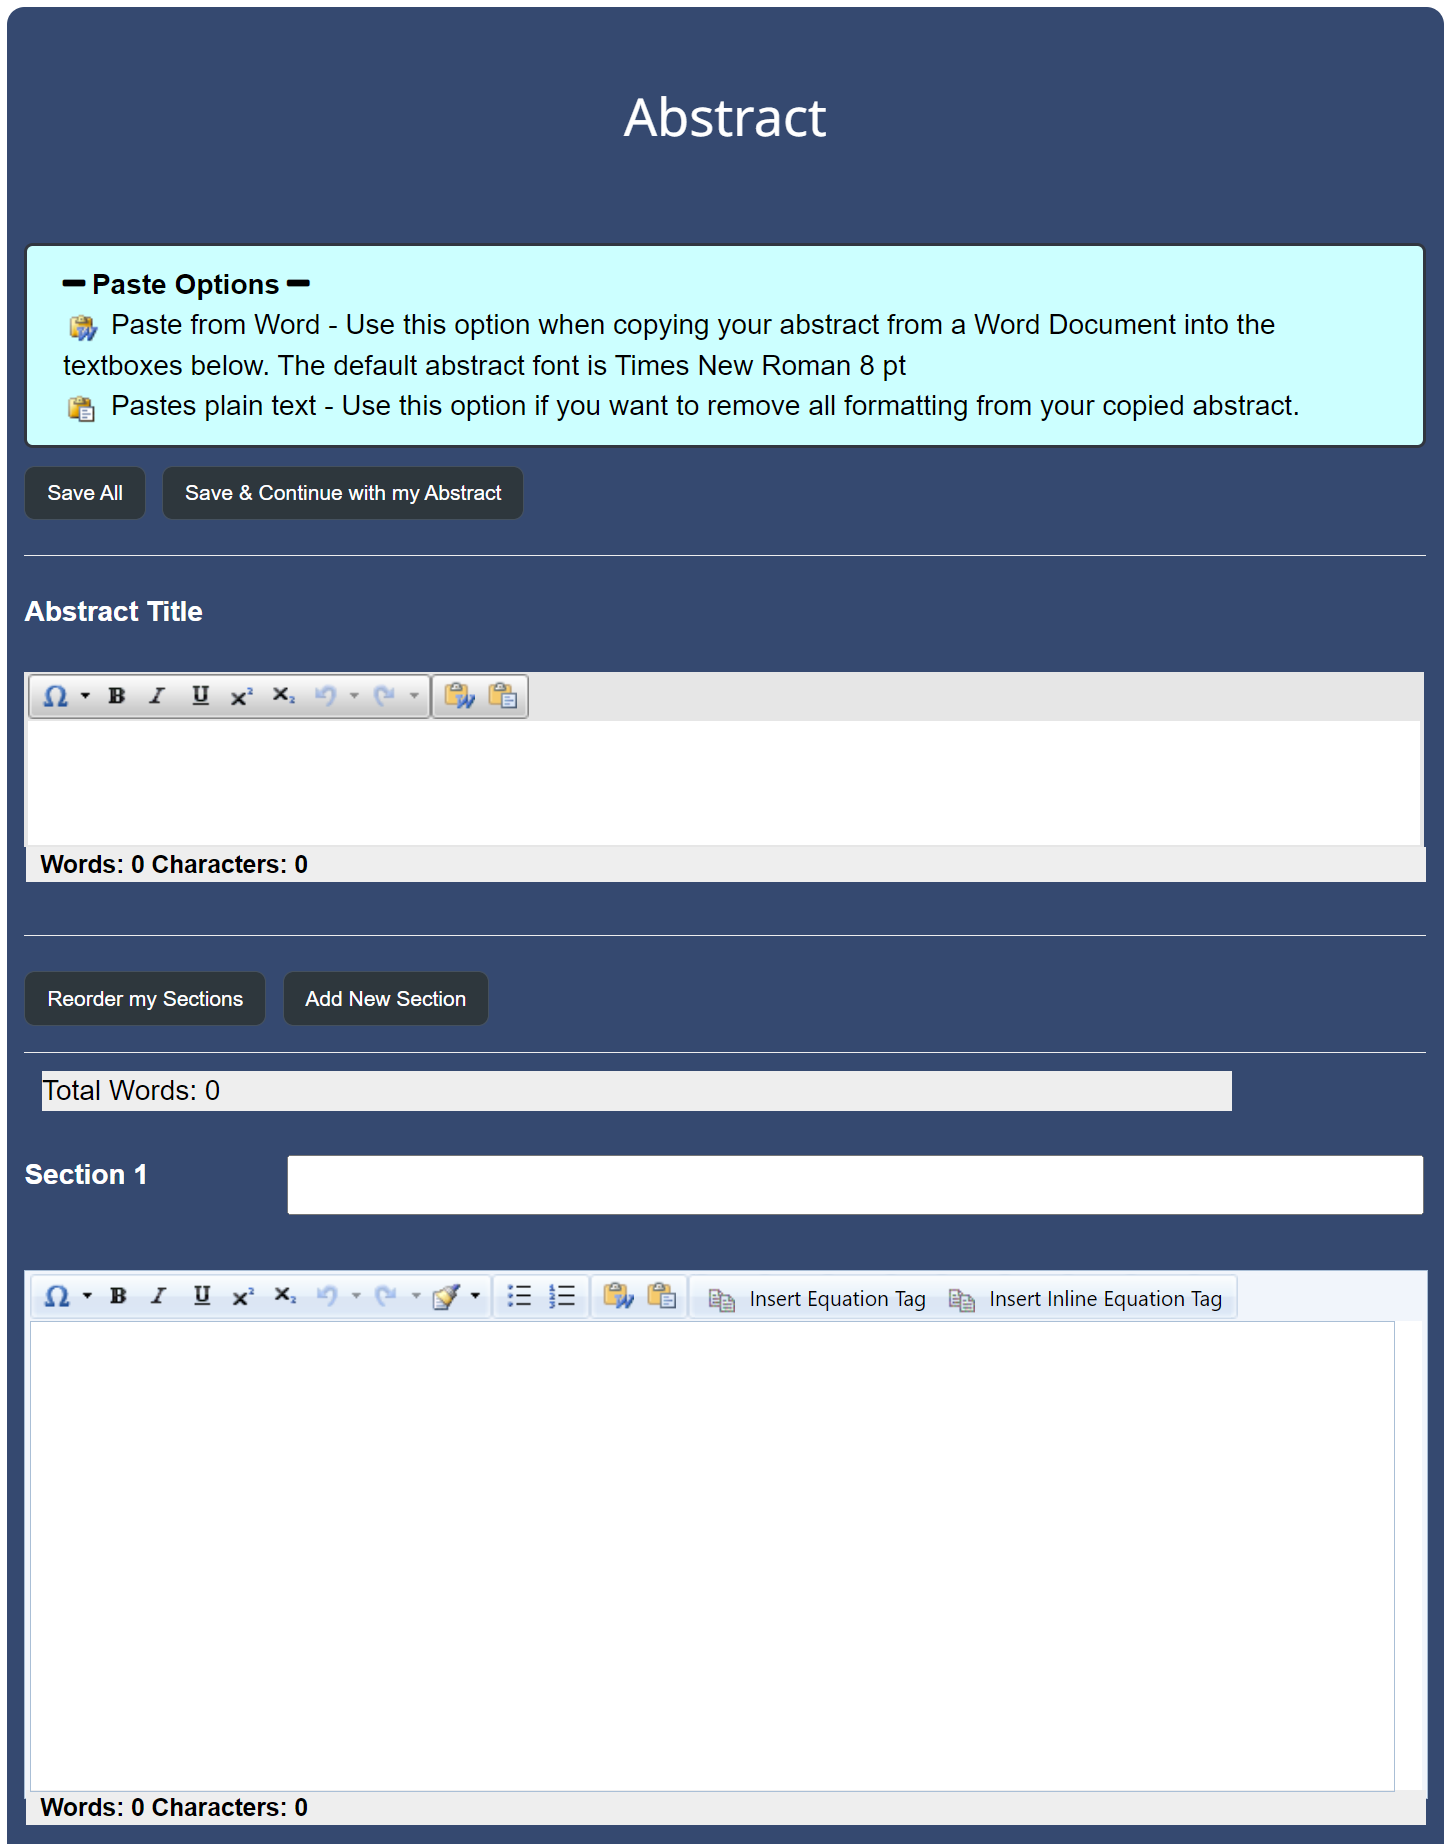
This is the core of the submission process. Start with the title, which is limited to 125 characters. Below this, the page will automatically include Section 1, “References,” and “Acknowledgments.” You can add and title new sections, such as “introduction,” “methods” or whatever else you would like, by clicking the “Add New Section” button.
You can copy and paste your abstract text into the appropriate sections. All formatting will be stripped from this text unless you use the “Paste from Word” button, which looks like this:
![]()
You can also add bold, italic and other formatting as needed. DO NOT create a Synopsis section yet. You will be asked to add this later in the submission process.
There will be a separate field to enter your synopsis. Please do not include the synopsis in this part of the process.
Special Characters
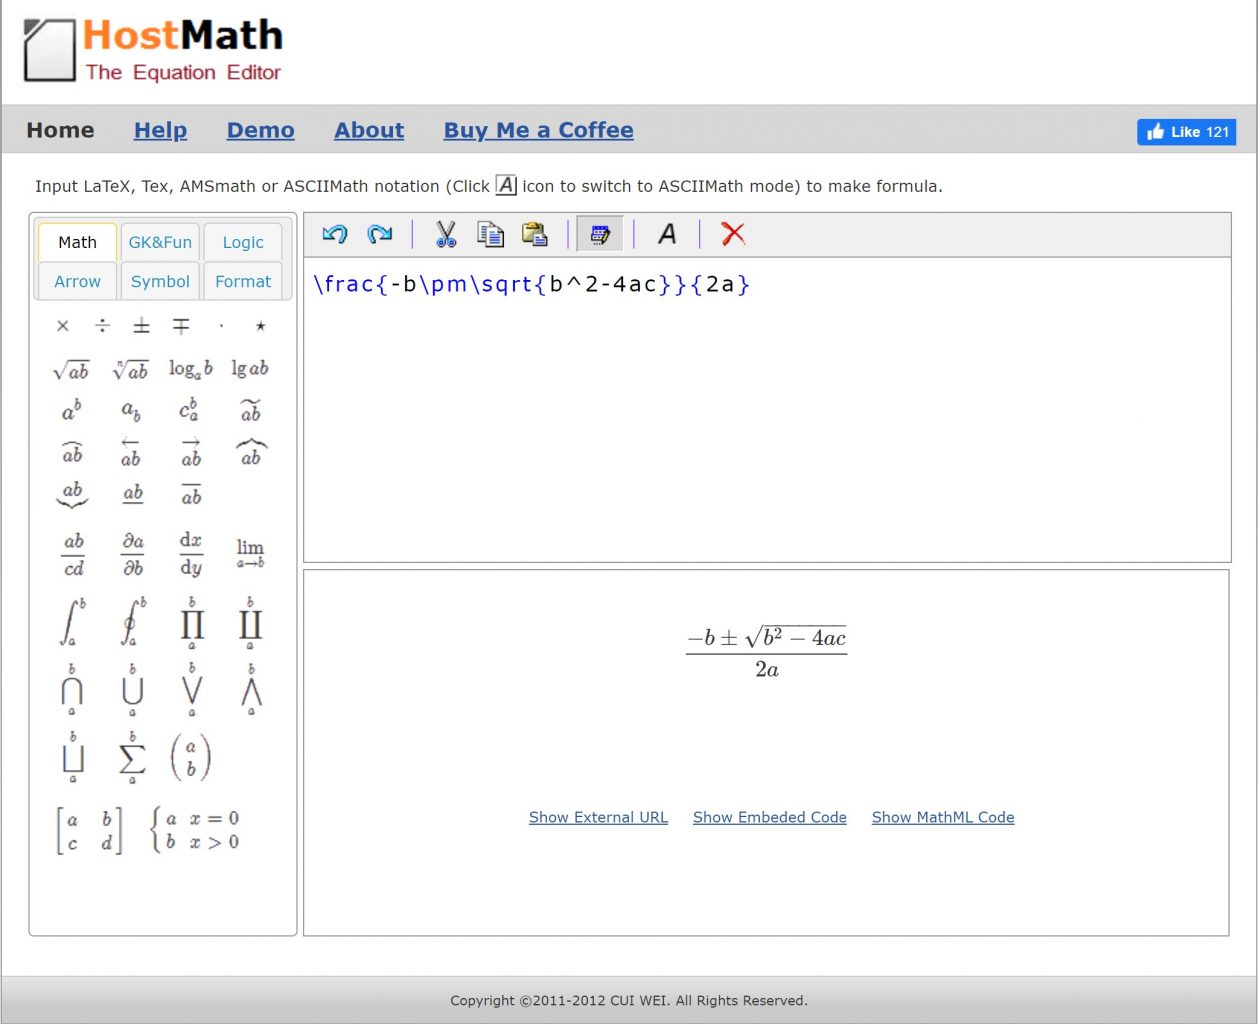
Individual Greek characters tend to come across reliably when copied from Microsoft Word. However, since the abstract will be rendered in HTML, equations are a separate issue. These will be entered using MathJax. For those who are unfamiliar with MathJax or those used to working in e.g. MathType, there are several equation tools on the web. One suggestion is HostMath. To use HostMath, click the buttons on the left panel to enter the mathematical symbols you need. The top right panel is the coding and the bottom right shows how the equation will appear to the reader. Once you are satisfied with the equation, copy all of the code in the upper right panel to your document or directly into the appropriate section in the submission site.
Inserting Equations
In the toolbar of a given text field, there are two buttons for entering equations into the text: “Insert Equation Tag” and “Insert Inline Equation Tag.”
Insert Equation Tag is for an offset equation, which is an equation that will be displayed on a line by itself. This button inserts $$ into the text.
Insert Inline Equation Tag is for an inline equation that will appear in the body of the text. This button inserts $$$ into the text.
Important: The $$ or $$$ tags must be added on both ends of your equation or it will not display correctly.
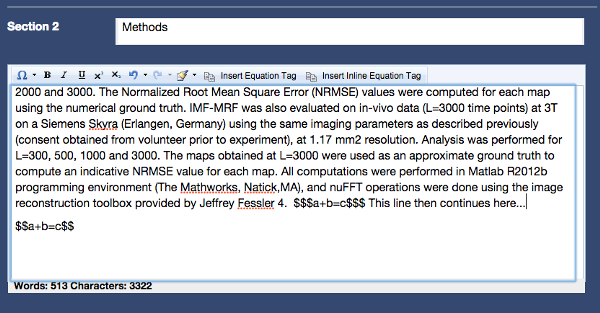
As you can see in the above figure, the format should be $$a+b=c$$ for offset equations or $$$a+b=c$$$ for inline equations. Thus, the way you get your MathJax equation into this document is to paste the text you copied from HostMath in between these symbols. For example, $$\frac$$.
Once you are done with your first section, you can add more sections by clicking the "Add New Section" button. This will give you another box to enter the section title and the body text for the next section. Continue this process until you are done entering all of your text. Next, click the "Save & Continue with my Abstract" button. Don't forget, there is a 750 word limit on the abstract length. The site will tell you if you are over this limit.
Please click "Save All" frequently to ensure you don't lose your work.
Step 5: Add Figures
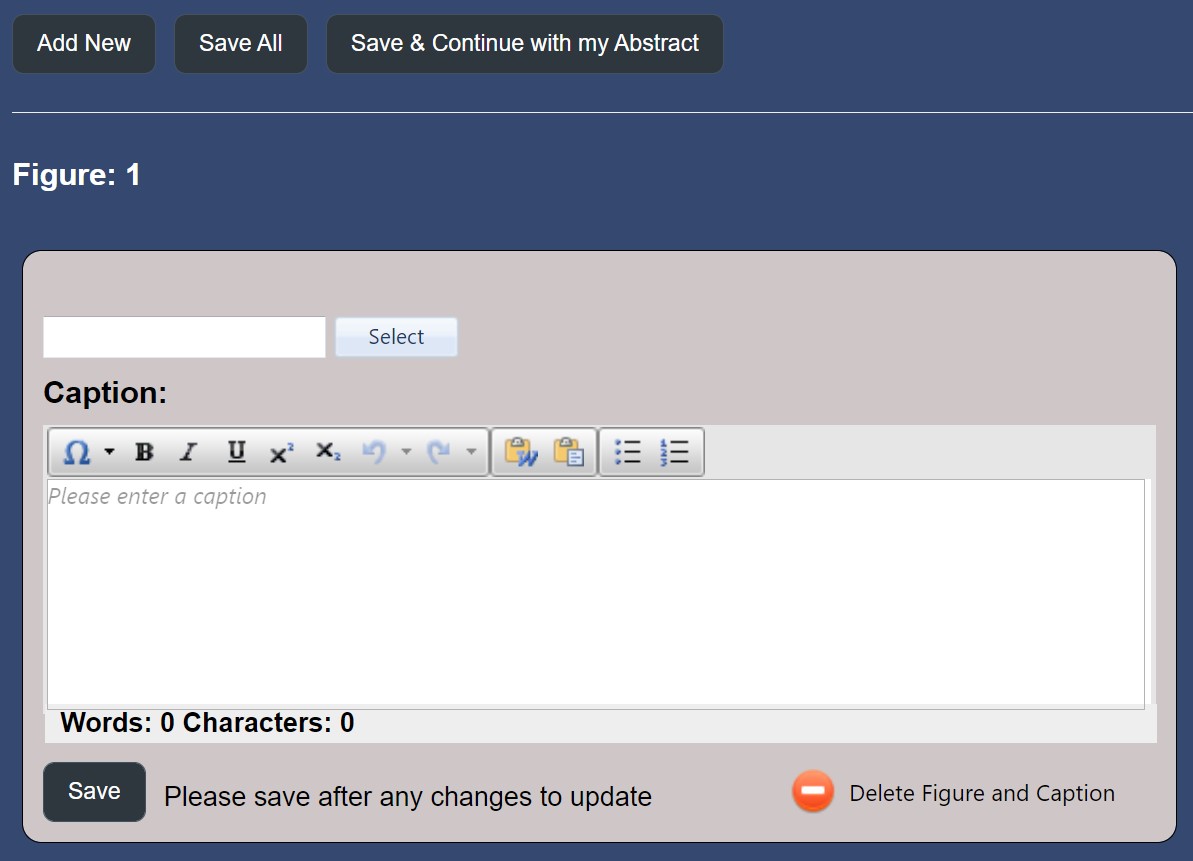
On the figures page, start by clicking the “Add New” button. This creates a new gray box where you can select a file to upload and enter the figure caption. Despite the “Figure: 1” text above the box, the system does not automatically number the figures, tables or captions. Please begin each caption with something like “Figure 1:” or “Table 1:” so your images are numbered.
To upload an image, click the “Select” button at the top of the gray box and select the image file on your local machine. These files can be in many formats including jpg, gif and png (note: tiff files will not work). Next, enter the caption. Figure captions are limited to 500 characters each. Next, click “Save” in the bottom left of the gray box. A small preview thumbnail of your figure will appear in the gray area. To add more figures, click the Add New button and follow the above steps for each figure.
Once you are done uploading your figures, click the “Save & Continue with my Abstract” button. You can upload up to 5 figures for each abstract. There is a maximum file size of 2MB for each figure. Finally, please upload tables as figures.
If you upload more than one figure, the next page will ask you to specify which image is your primary image. This selection may affect which image appears in the Proceedings, the Program, and digital poster teaser slides.
Rules for Figures & Tables
- Maximum of 5 figures per abstract
- Maximum file size is 2MB per figure
- Tables must be uploaded as images (jpg, gif, png)
- Captions are limited to 500 characters (no caption for preview figure)
Step 6: Abstract Detail
This step is very important to get your work presented in the session of your choice. Please read this thoroughly and choose appropriate categories and keywords.
Read “Choosing Your Abstract Category” on the call for abstracts (the blue column) for more information.
There are 14 major scientific categories for 2025 (see “Scientific Categories” box). Each category will have a “restricted” list of subcategories, which will be included as keywords in the final abstract. You will choose one Primary category/subcategory pair, and one Secondary category/subcategory pair. Then you select a generally keyword, and then may type in additional keywords.
The following are examples based on actual abstracts to get you started:
Example 1
Abstract title: “High-Resolution Brain Metabolite T2 Mapping Using Optimized Multi-TE MRSI“
- Primary category/subcategory pair: Contrast Mechanisms: Spectroscopy
- Secondary category/subcategory pair: Analysis Methods: Data Processing
- General keyword: Relaxometry
- Other keyword: T2 Mapping
Example 2
Abstract title: “Choroid plexus function and structure across the lifespan as evaluated using perfusion-weighted MRI: Implications for glymphatic dysfunction“
- Primary category/subcategory pair: Neuro: Neurofluids
- Secondary category/subcategory pair: Contrast Mechanisms: Perfusion
- General keyword: Aging
- Other keyword: Glymphatics, Lifespan
As you can see, it depends on you to determine in which session(s) you see your abstract being presented. What possible audiences are you interested in?
Here are a few tips to help you with the process:
- Is your abstract on technical development and methods-heavy? Choose a technical category.
- Is your abstract on an application of a technique? Choose a more clinical category (Neuro, Body, Cardiovascular, Musculoskeletal, Pediatrics)
- Do you think your abstract could fit both technical and a clinical category? Choose a technical primary category/subcategory and a clinical secondary category/subcategory or vice-versa.
- Do you think your abstract only goes in ONE main category? In this case your primary and secondary categories would be the same but your primary and secondary subcategories should be different.
- Cannot find your keyword from our list? Use the empty space provided for third keyword and self-populate it with your own words.
- Do not repeat category and subcategory names as the keyword, as these are already included.
Fill in the rest of the information on this page regarding subject compliance, stipends, etc.
Scientific Categories
- Acquisition & Reconstruction
- AI and Machine Learning
- Analysis Methods
- Body
- Cardiovascular
- Contrast Mechanisms
- Diffusion
- fMRI
- Interventional
- Musculoskeletal
- Neuro
- Pediatrics
- Physics & Engineering
- Preclinical
Step 7: Disclosure
Fill in all of your disclosures here. If you have declarations, a space will appear for you to enter details.
Step 8: Proofread
Click the “View Abstract” button. This is how your abstract will appear. Double-check everything in your submission. We recommend you have one or more co-authors also proofread everything. To save a copy of your submission, print the abstract page as a PDF.
Remember, you can click the circles at the top of the page to go back to those sections to make edits.
Step 9: Submit
All done? Click the Submit button. This one is complete!
Abstract review will take place over the next couple months, and acceptance notifications will be emailed to first authors at the end of January, after the AMPC meeting in January.
If you have more abstracts to submit, go back to the submission site’s home page, click “Create a New Abstract” and proceed through these steps again.