
A Guide to the  ECHO Abstract Submission Process
1. Register or Log In to ECHO
If you are already a registered user, you do not need to create a new account. Proceed to The Abstract Submission Process.
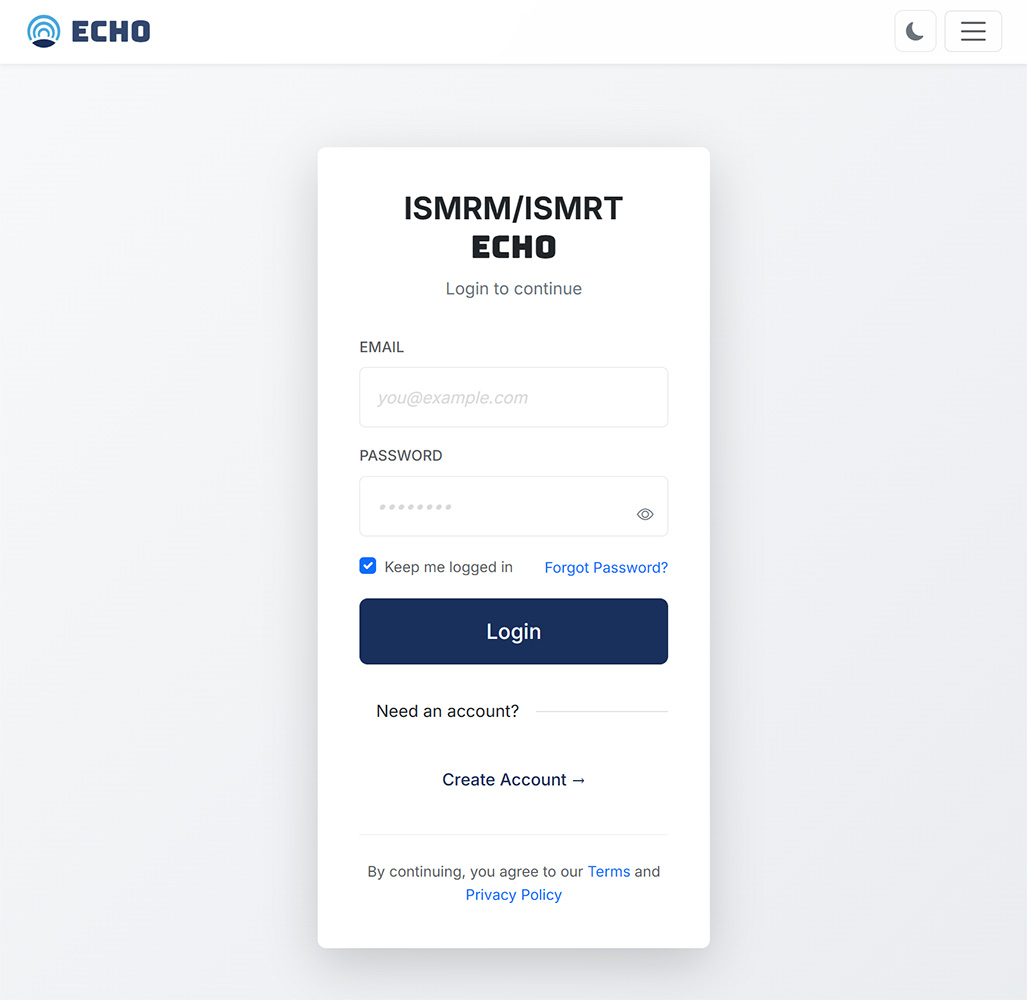
Navigate to echo.ismrm.org and select “Create Account.”
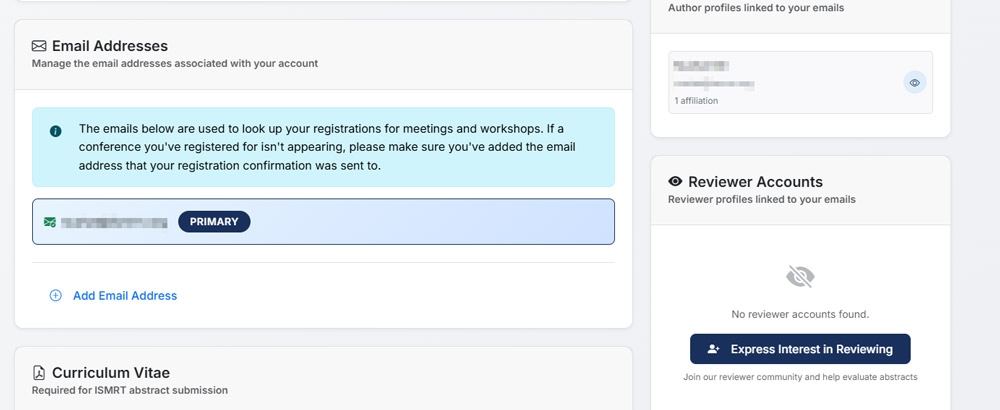
This user account will persist over the years and can be used for both workshops and Annual Meetings. It is possible to associate more than one email address with a user account. We recommend you add both your institutional and personal emails to ensure access if your institutional address changes.
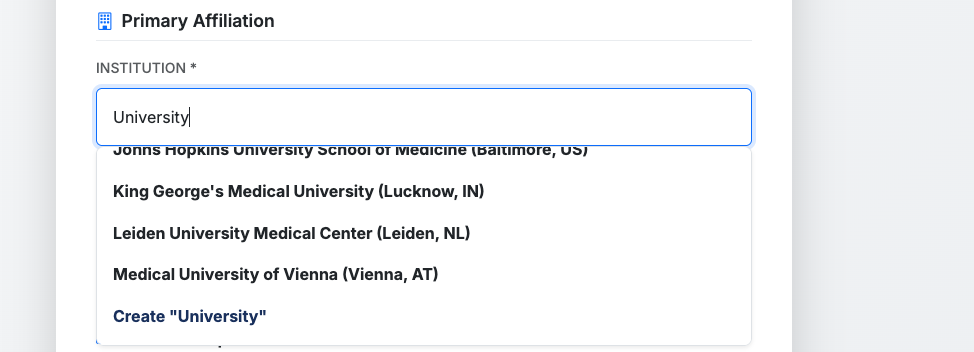
After entering your name and email, enter your Primary Affiliation. If your institution does not appear in the list as you type, please email support@ismrm.org. Include the full name of your institution plus its address and your department (if necessary) in the body of your message.
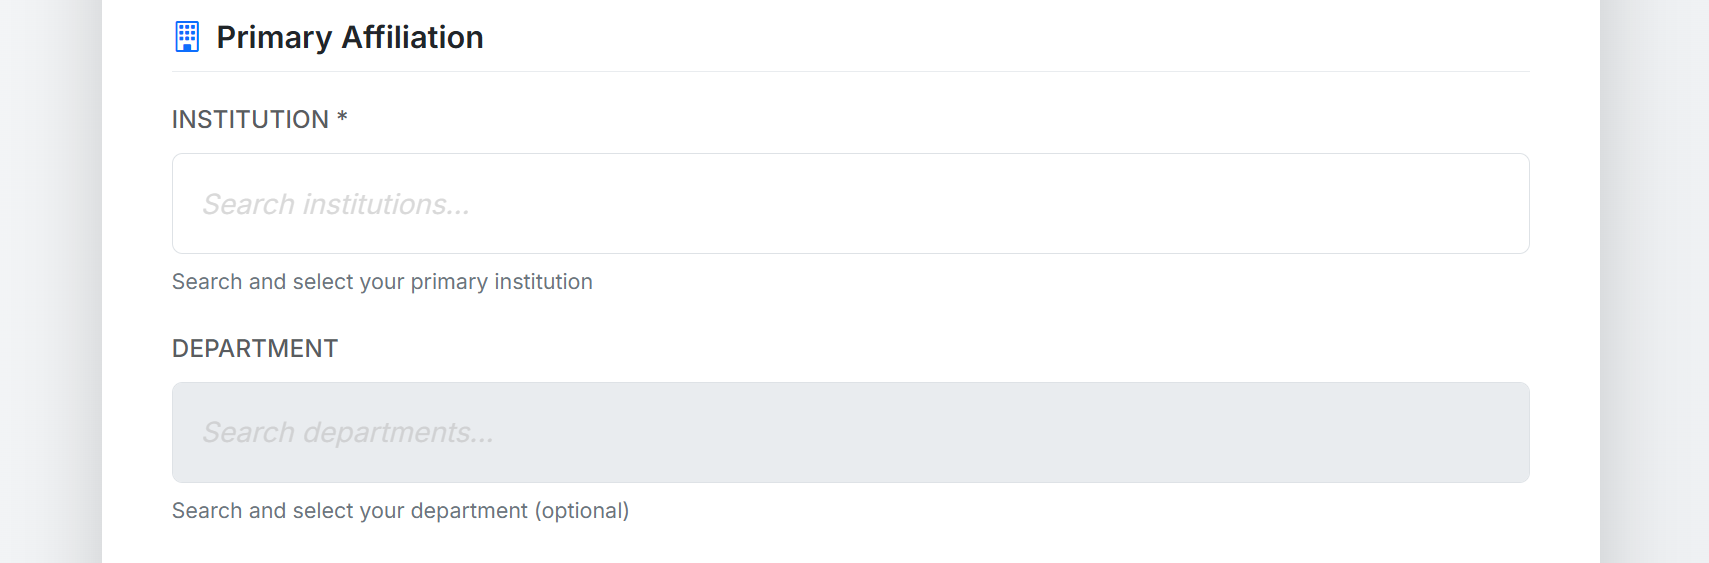
Please do not include your department in the Primary Affiliation line. There is another line for your department below it.
You will also be asked whether you are interested in serving as an abstract reviewer. Select this option only if you would like to be considered as a reviewer. You will be able to provide your reviewer preferences and areas of expertise separately.

Once your registration is complete, please return to echo.ismrm.org and log in to submit an abstract.
2. The Abstract Submission Process
Before beginning your submission in ECHO, we recommend that you write and organize your abstract in a common text editor without any formatting.
Then, when you have your abstract ready, proceed with these directions.
When you log in at echo.ismrm.org, the first thing you will see is your dashboard. It will look something like this:
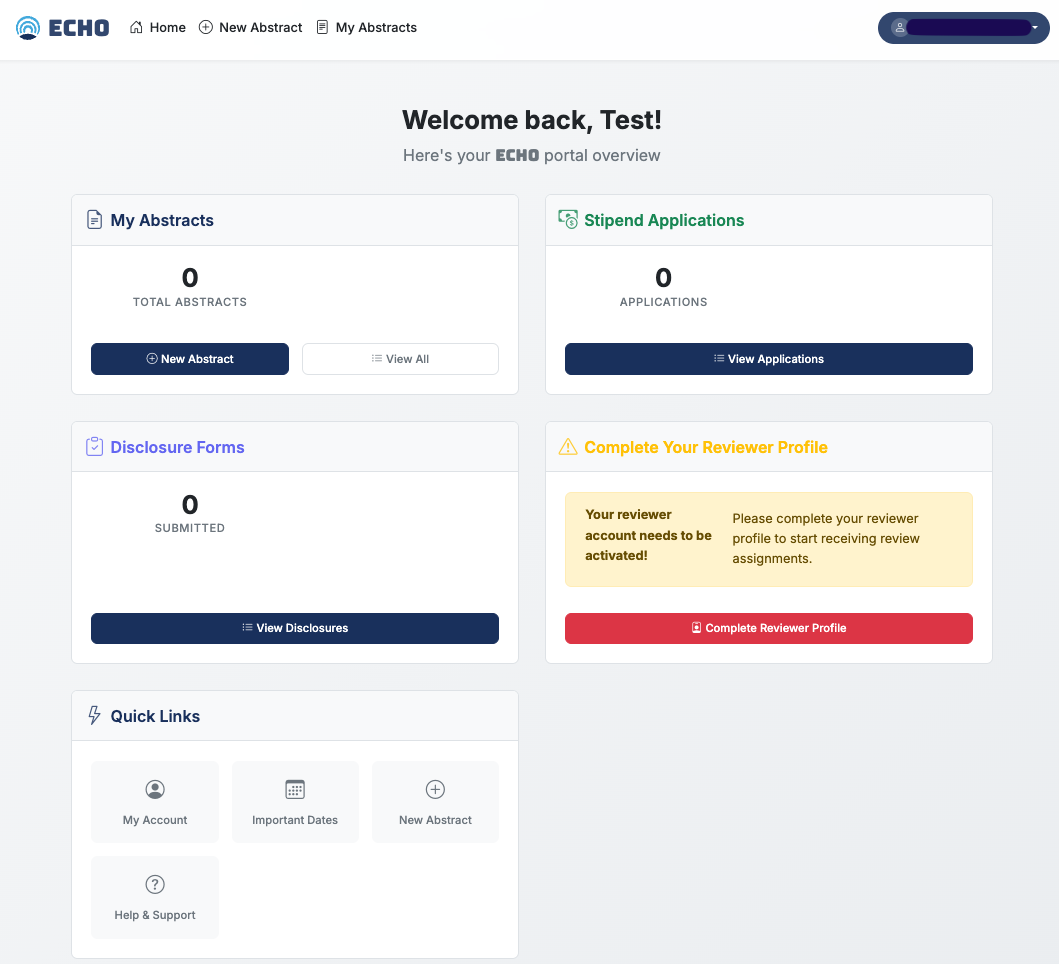
Select “New Abstract” in the “My Abstracts” box or in the menu bar.
Now you will see this:
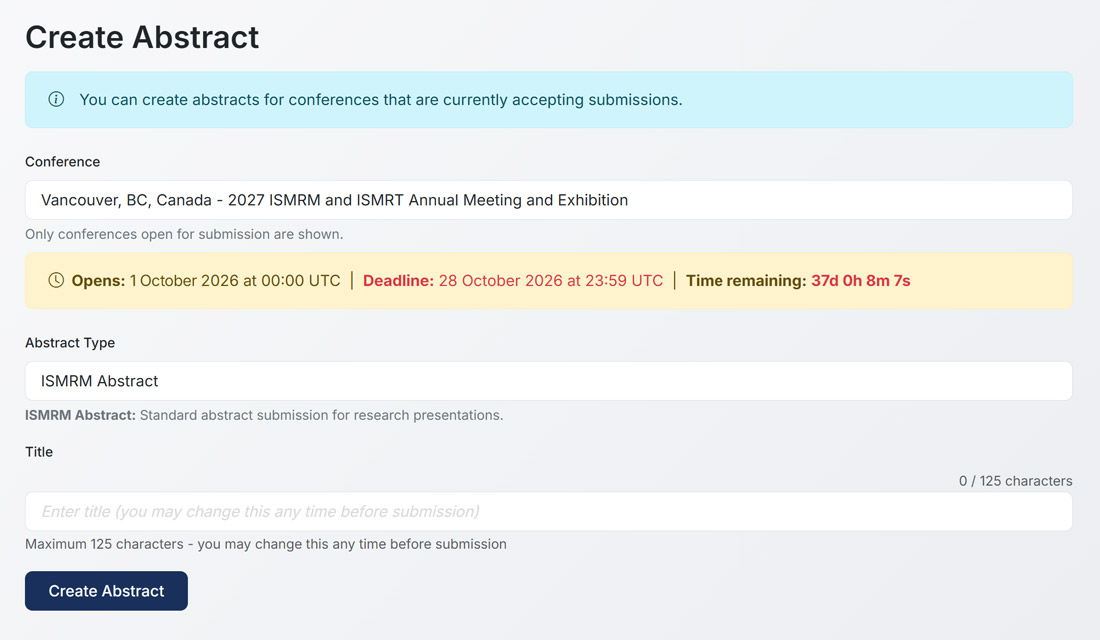
Select the 2027 ISMRM & ISMRT Annual Meeting & Exhibition.

Select the appropriate abstract type.
Again, be careful to select the correct type! Incorrect abstract type can cause your submission to be rejected. If you’re not sure which type is correct, refer back to the Call for Abstracts page.
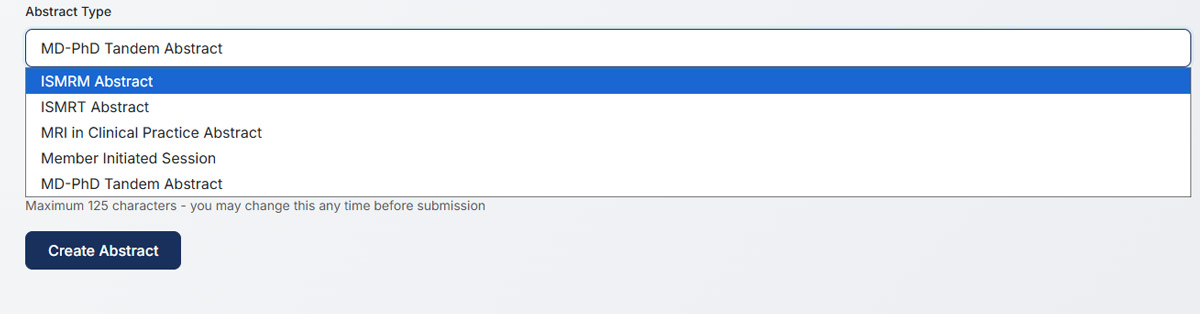
Finally, enter your title in the Title field and click the “Create Abstract” button. You may update your title at any time prior to submission.
For MD-PhD Tandem abstracts: Select the MD-PhD Tandem, review the acknowledgement, then select I Acknowledge and Create Abstract.
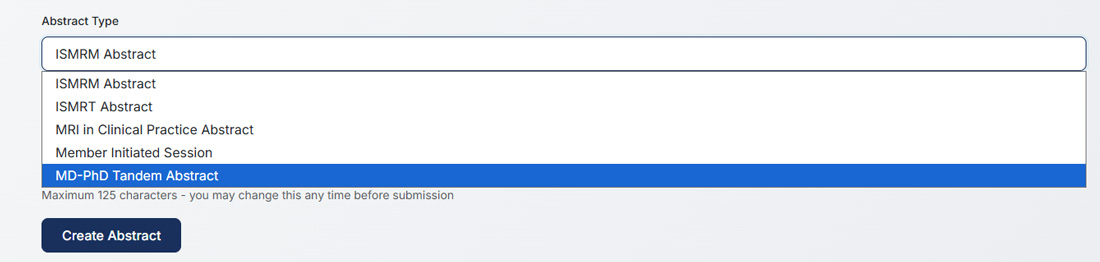
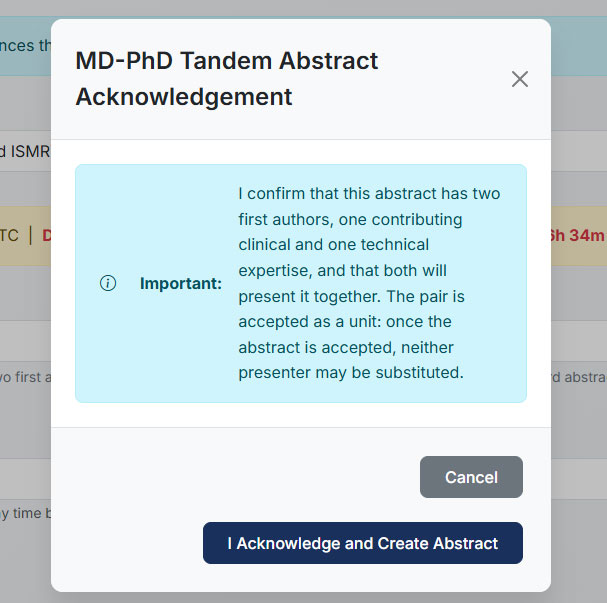
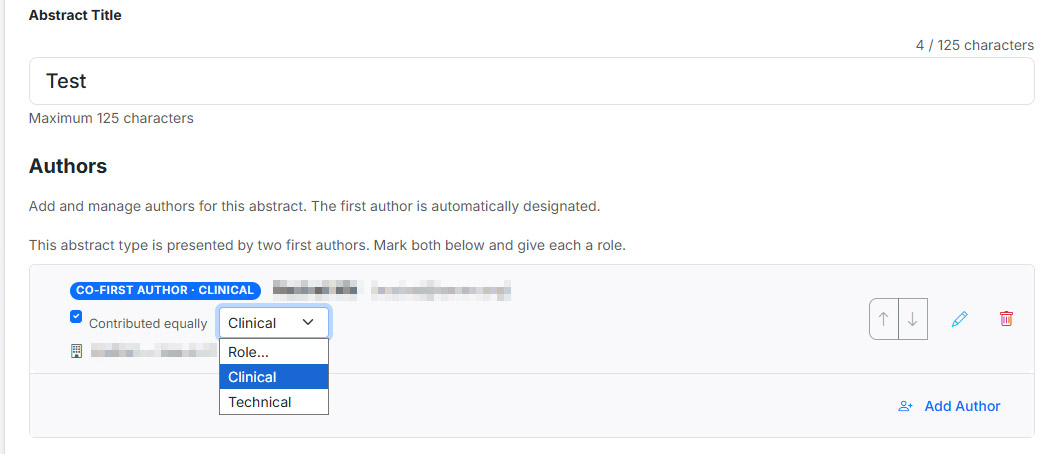
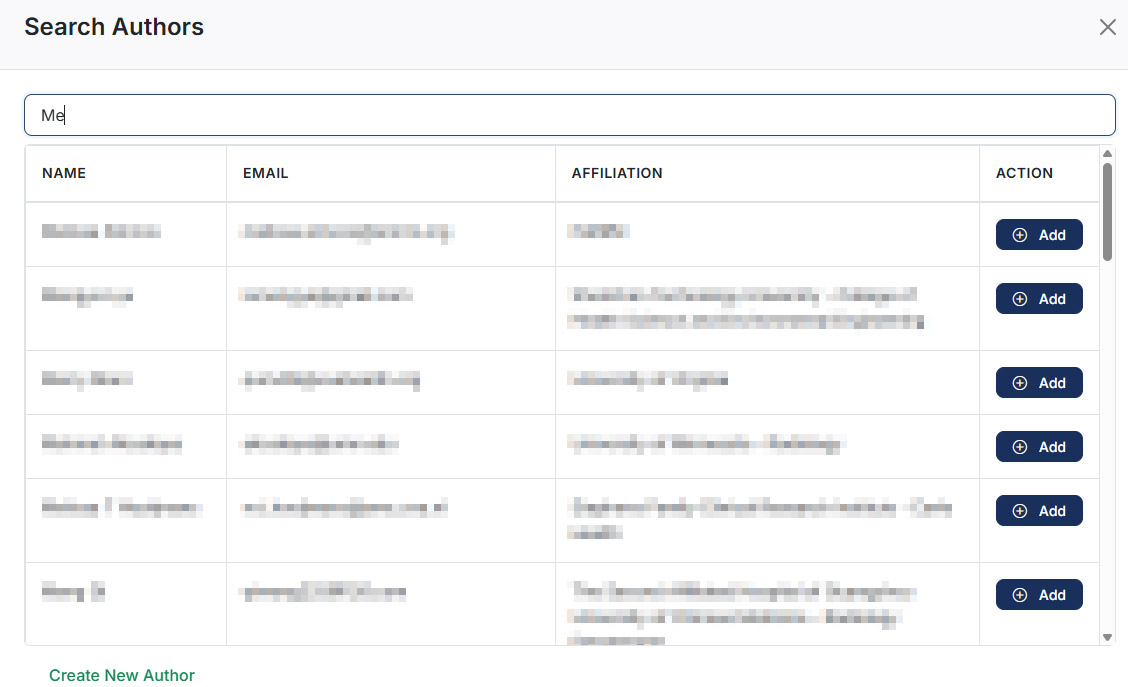
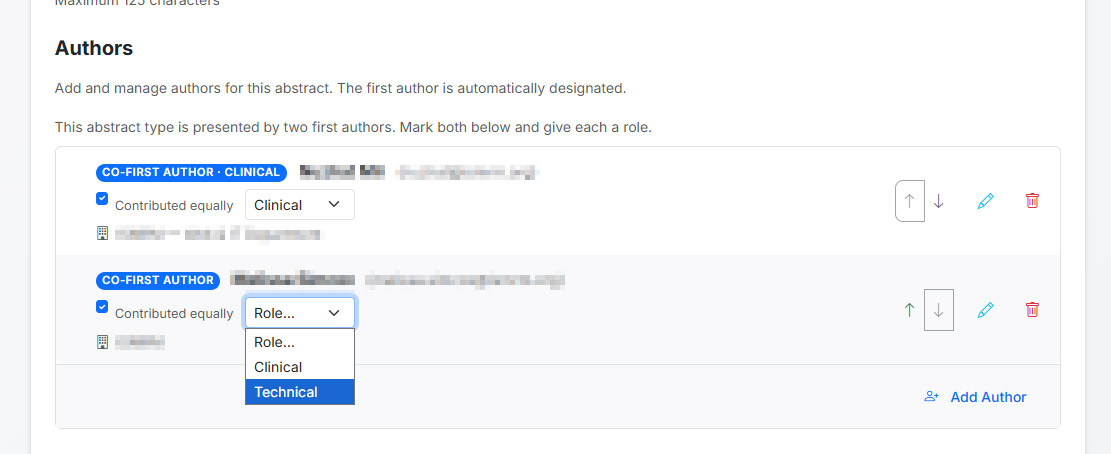
For an MD-PhD Tandem abstract, add the clinical expert and technical expert as the first two authors. They will be recognized as joint first authors.
Add Role:
Add Author:
Add Role:
3. Create Your Abstract
On the Edit Abstract page you can revise your title and add the authors.
Use the “Add Author” button to add authors. When authors are added, you can use the buttons on the right side to rearrange the author order, edit an author’s details, and delete an author.
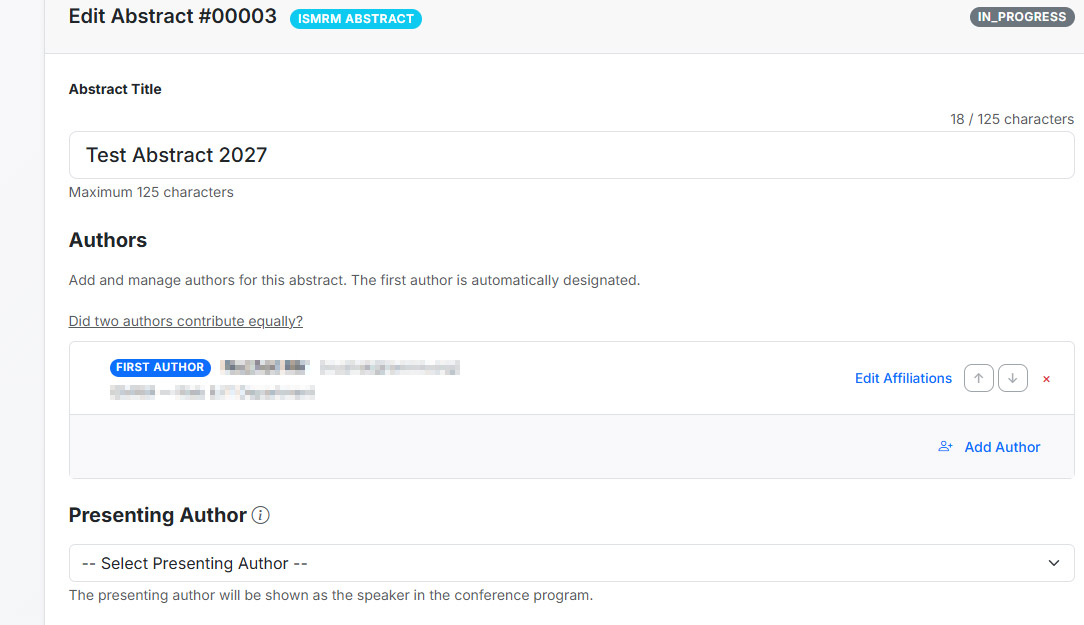
For Standard and Clinical Practice Abstracts, indicate one Presenting Author, who will be identified as the speaker in the conference program. For an MD-PhD Tandem Abstract, both first authors should be designated as Presenting Authors because they will present jointly.
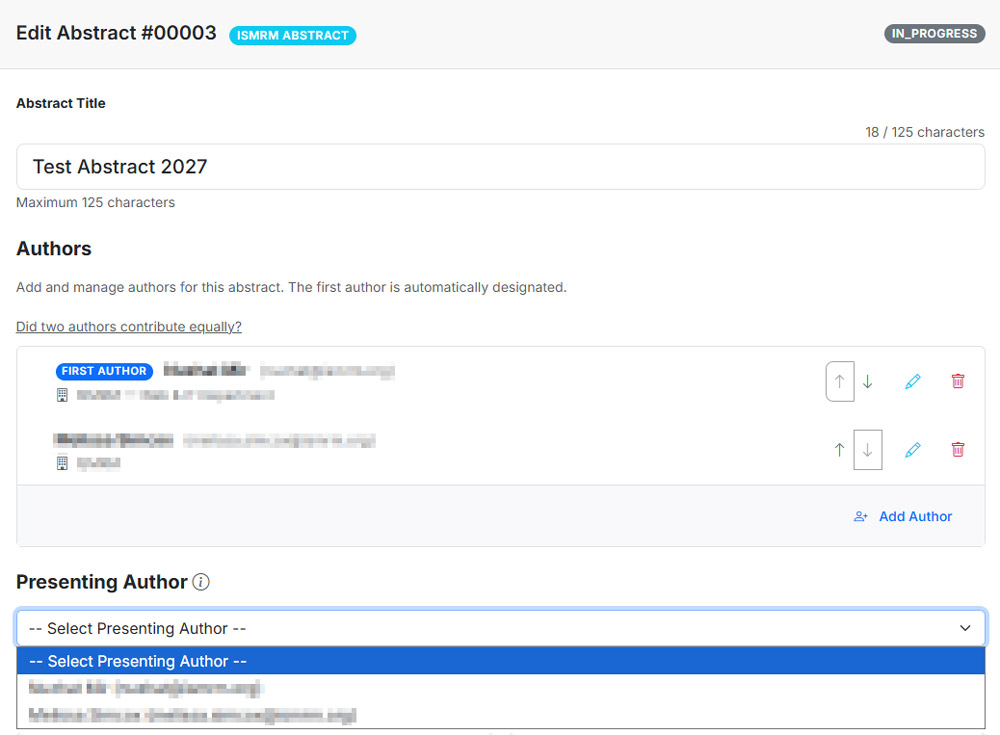
Echo automatically saves your abstract as you work. You can also save your abstract at any time using the ‘Save’ button at the bottom of the page.
Please select Primary and Secondary Categories and Subcategories. The list of categories and subcategories is available here.
Please do not select the same Primary and Secondary Subcategories.
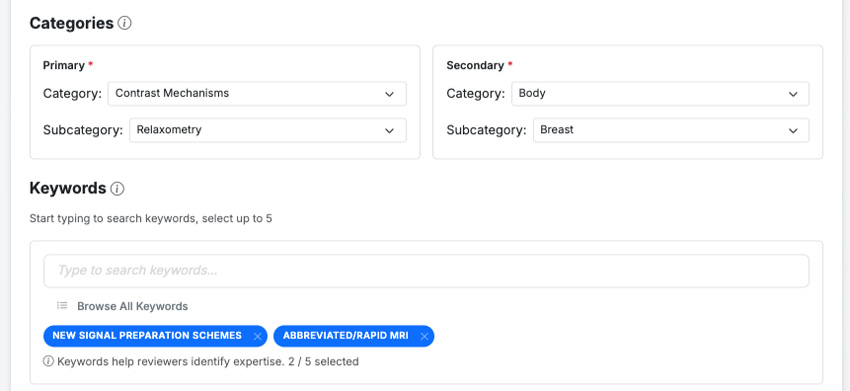
You may add up to five keywords. If your keyword is not supplied, you can add a keyword to the list. Keywords improve the ability to search the conference program and proceedings.
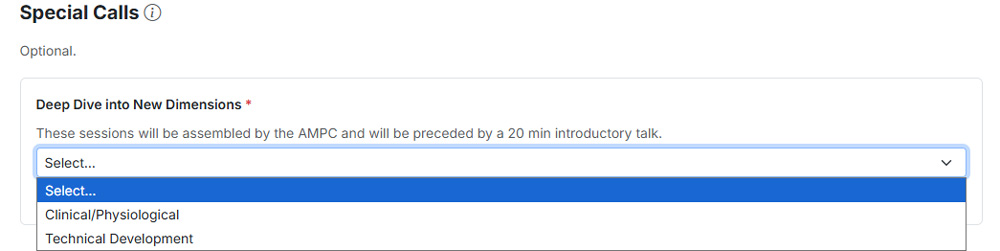
When submitting a standard ISMRM abstract, you have the option to have your abstract considered for a “Deep Dive into New Dimensions” sessions. These are oral sessions that focus on developing or applying MR sensitivity along specific dimensions, e.g., such as spatial, temporal, velocity, or exchange dimensions, or any other quantitative biomarker dimension. These sessions will be assembled by the AMPC and will be preceded by an introductory talk.
As in previous years, please add your Impact, Synopsis, and Abstract. Directions for the Impact, Synopsis, and Abstract requirements depend on your abstract type and are given on these pages:
- Standard Abstract Guidelines
- MD-PhD Tandem Abstract Guidelines
- MRI in Clinical Practice Abstract Guidelines
When specific abstract sections are required, the ECHO platform is pre-populated with these sections. For the Standard Abstract, you should enter the abstract sections; common sections include Introduction, Methods, Results, and Discussion/Conclusion.
4. Enter Your Abstract Content
Enter the required Impact, Synopsis, and Abstract information according to the guidelines for your abstract type as noted in the previous step.
When specific abstract sections are required, the ECHO platform will be pre-populated with the appropriate sections. For a Standard Abstract, common sections include Introduction, Methods, Results, and Discussion/Conclusion
Math Text
- Within the Content Sections, you can use both inline and display math to add mathematical expressions, bold or italic text, subscripts, and superscripts.
- For help with the math text, you can use com.
- When you copy and paste the math text from hostmath, include the dollar signs:
- Inline Math ($[math type]$) or
- Display Math ($$[math type]$$).
- To edit or copy Math Text, click on the rendered text in ECHO.
Here is a quick guide:
Superscripts can be used for references $^{1,2,3}$ |
Superscripts can be used for references 1,2,3 |
Subscripts use underscore $T_1$. |
Subscripts use underscore Τ1. |
$\textbf{This makes bold font.}$ |
This makes bold font. |
$\textit{This makes italics.}$ |
This makes italics |
5. Add References
References should follow the Vancouver citation style, we suggest using Arabic numerals in the order in which they appear in the abstract.
You can include the references as superscripts using the [tool] or via superscripts with Math Text or via square brackets.

At the end of the abstract, list references numerically in the order in which they were cited in the text. You can add citations in bulk by listing one citation per line.
Citations can be added individually or in bulk. Please include DOIs and/or PMIDs in your citations when available.
DOI formats are
doi:10.xxxx/xxxxx
or
https://doi.org/10.xxxx/xxxxx.
PMID formats are
PMID: 12345678
or
PubMed: 12345678.
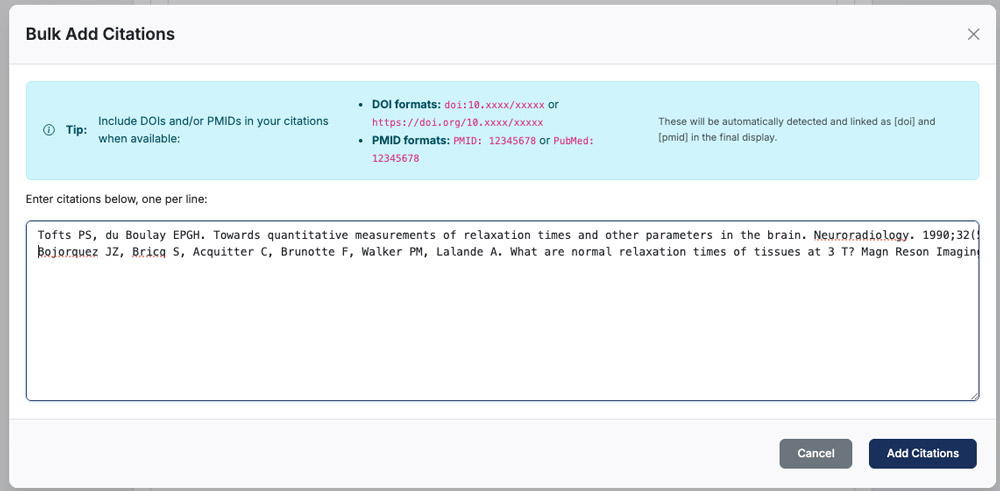
The citations are then listed individually, and if needed, you can rearrange or delete using the action buttons.

6. Adding Figures & Tables
To add figures or tables to your abstract, select Add Figure.
Tables should be included as high-resolution image files using the Add Figure option.

Select the image file, which can include an animated figure. Please ensure that animated figures are silent/muted or do not contain audio.
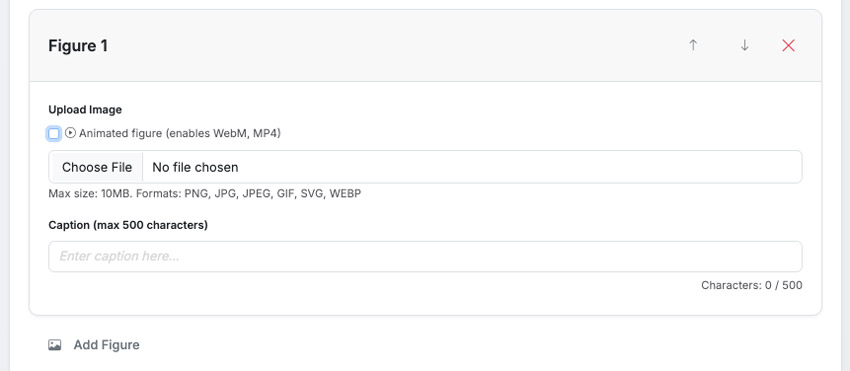
Figure captions are limited to 500 characters.
The system automatically indicates figure numbering when rendering and adds a hyperlink in the abstract text. You can use the buttons on the top right of the Figure menu to change the order of figures or remove a figure.
7. Add Acknowledgments and Preview Images
You can include an Acknowledgments section, which is not included in the Reviewer view of the abstract.
The Acknowledgments section will be shown in the conference proceedings.
Please include any links to code, data, or other supporting information in the Acknowledgments.
Institutional or Project Logos and Preview Figures.
- You are encouraged to upload Institutional or Project Logos and Preview Figures.
- The Preview Figure will be included in the conference program and will be visible to the public on session pages. This figure should be a simple representation of your work.
- The Institutional/Project Logos are limited to 1 MB and a maximum dimension of 300×300.
- The Preview Figures are limited to 1 MB and must be a 3:2 aspect ratio. These specifications are required for optimal view in the conference program. These figures are not included in the Reviewer view of the abstract.
8. Preview & Submit Your Abstract
Once all required sections are complete, select “Preview & Submit.”
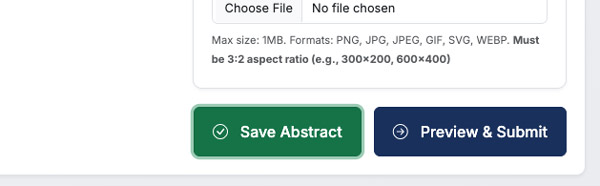
This takes you to the Abstract Review Before Submission.
Carefully review:
- Your abstract;
- The submission checklist; and
- The submission rules
Until you Submit your abstract, the status will be “Incomplete.”
Preview
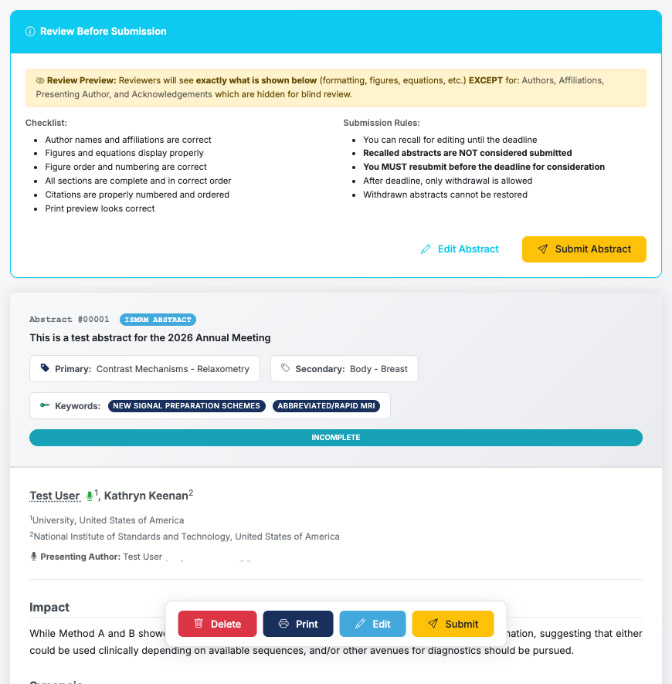
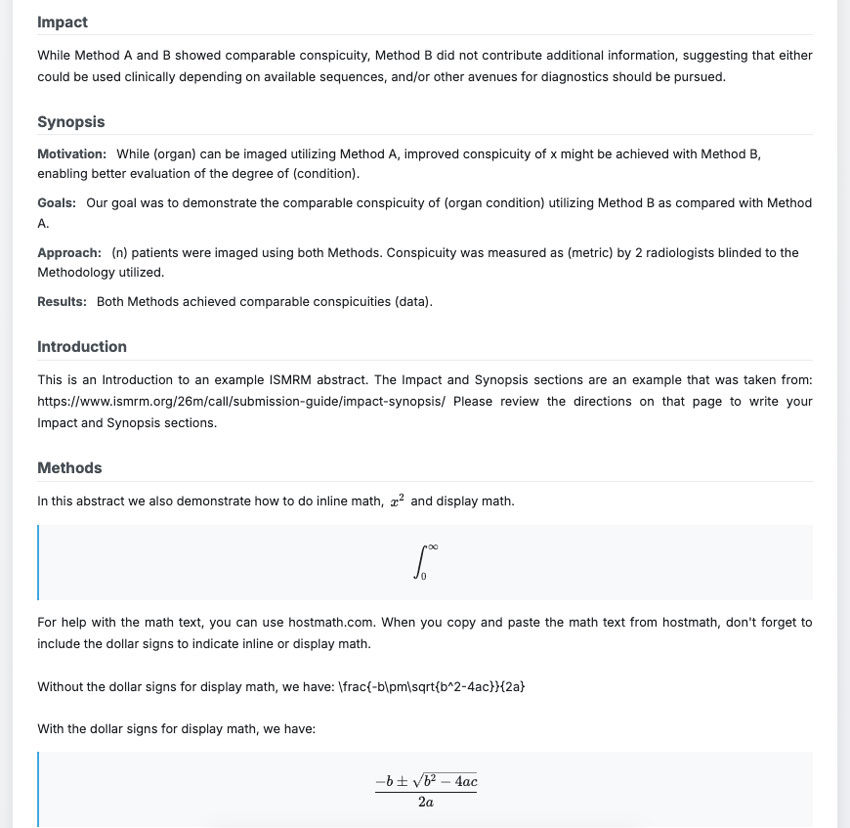
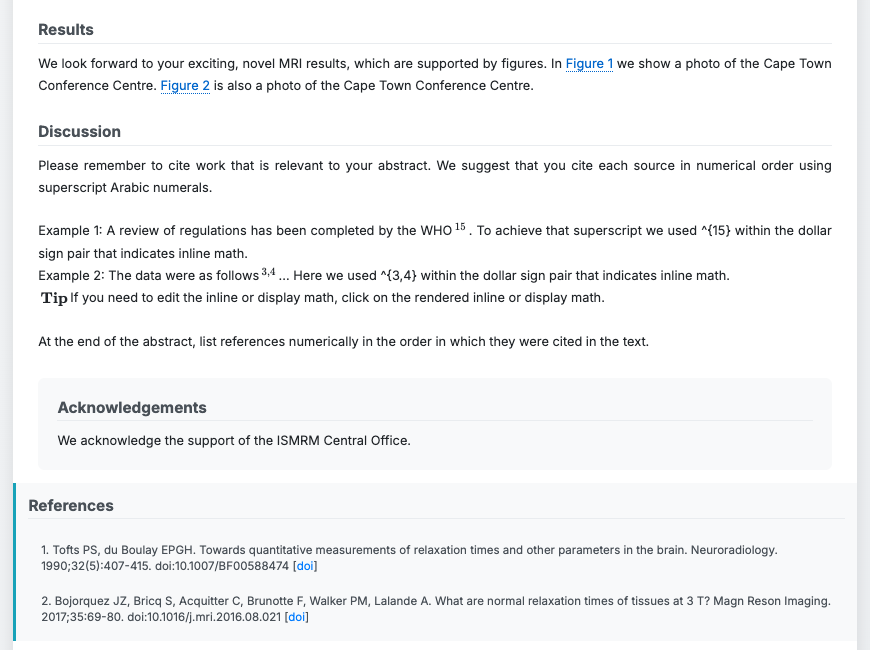
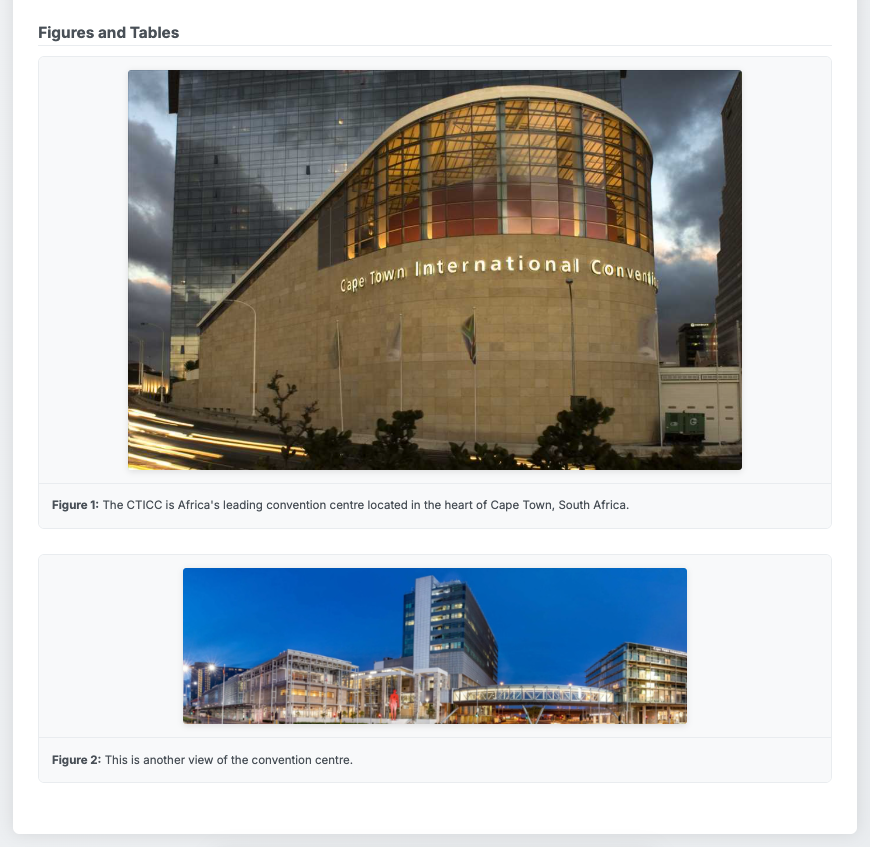
If changes are needed, select Edit to return to your abstract.
You can preview the pdf rendering of your abstract and save a copy by selecting the “Print” button. When you are ready, select the “Submit” button.
Then, you will need to complete the Abstract Submission Requirements, including your electronic signature to submit your abstract.
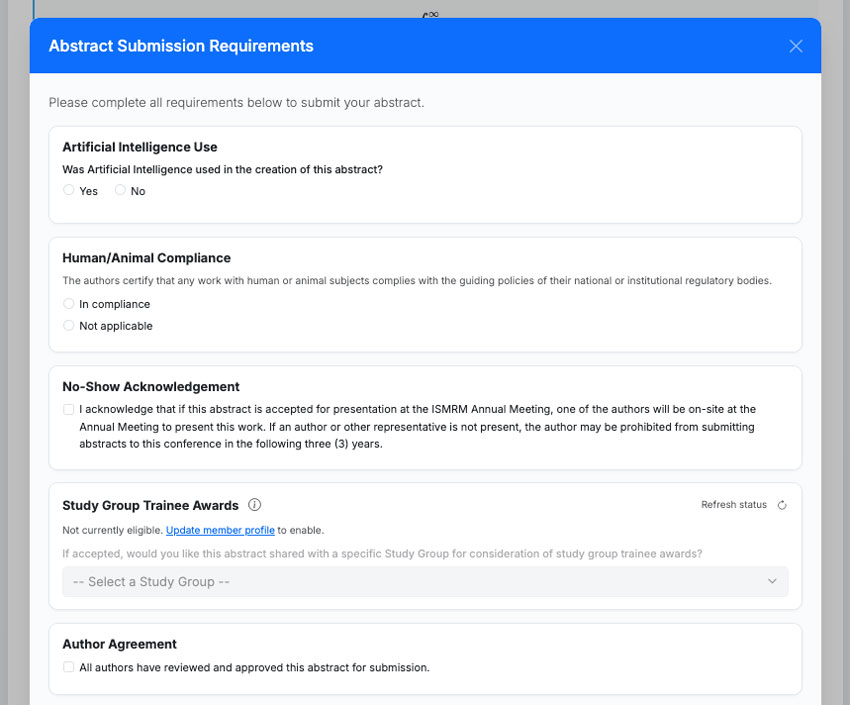
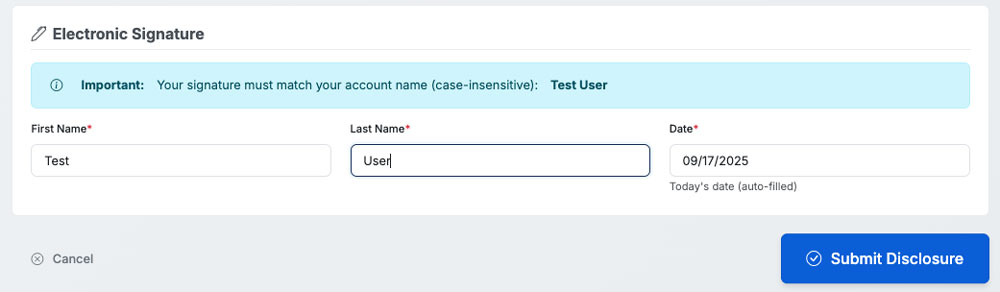
Upon submission of the abstract, a confirmation email is sent to the submitting author and all co-authors.
Once you submit your abstract, you will be directed to complete your disclosures.
9. Abstract Recall
During the Abstract Submission window, you may recall a submitted abstract if you need to make changes.
Navigate to My Abstracts and select Recall.
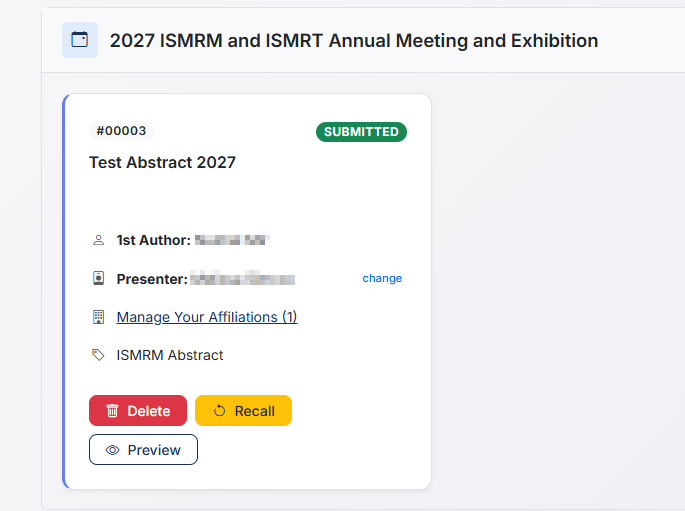
The system will warn you about the actions of Recall. Your abstract will be reverted to incomplete status, and you WILL NEED TO SUBMIT IT AGAIN. The Recall process unsubmits your abstract.
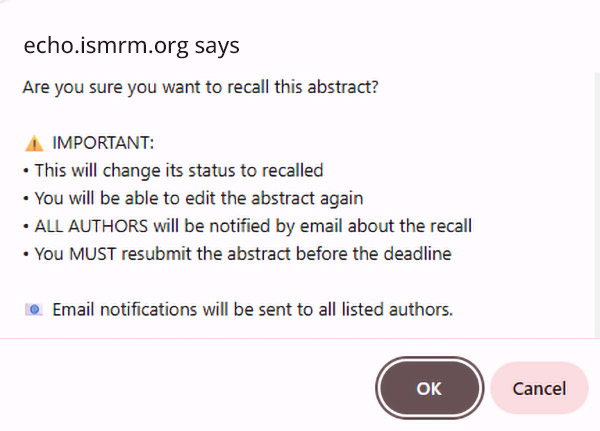
After selecting “OK”, you will select “Edit” from the “My Abstracts” page. Now you can edit your abstract. PLEASE REMEMBER TO SUBMIT THE ABSTRACT AGAIN.
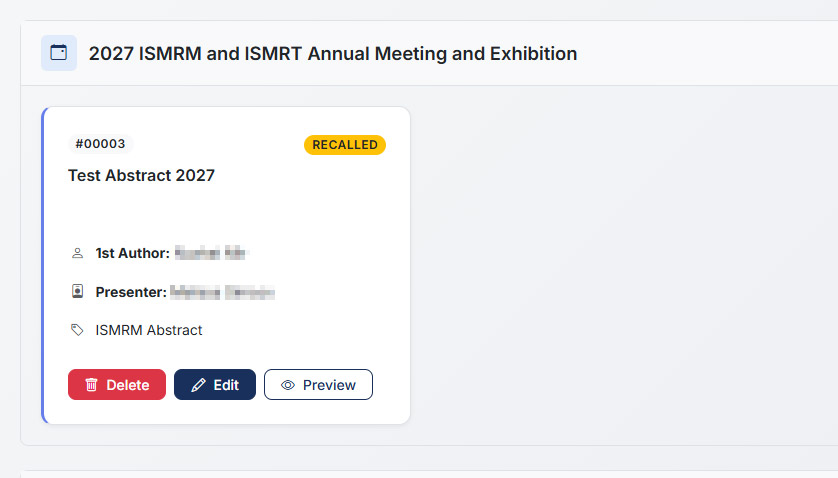
IMPORTANT: Recalling an abstract un-submits it and returns it to Incomplete status. You MUST submit the abstract again after making your changes.
Once Abstract Submission closes, abstracts can no longer be recalled. An abstract may be withdrawn after the submission period closes.
10. Complete Your Disclosures
After submitting your abstract, you will be directed to complete your Disclosure Form.
Please carefully read and complete the form.
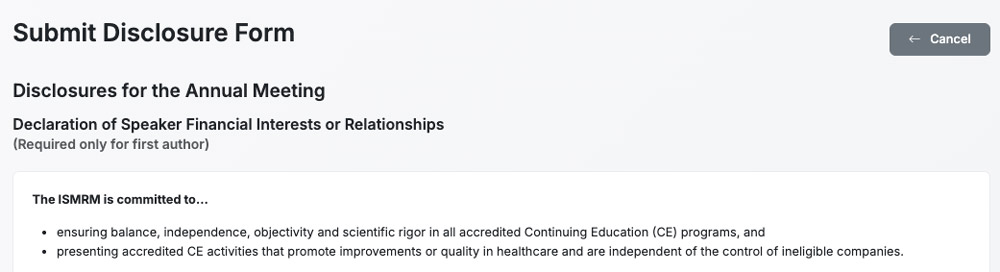
At the end of the form you will need to complete your electronic signature.
The completed form will be displayed on your Disclosure Forms menu. Select Print to save a copy.

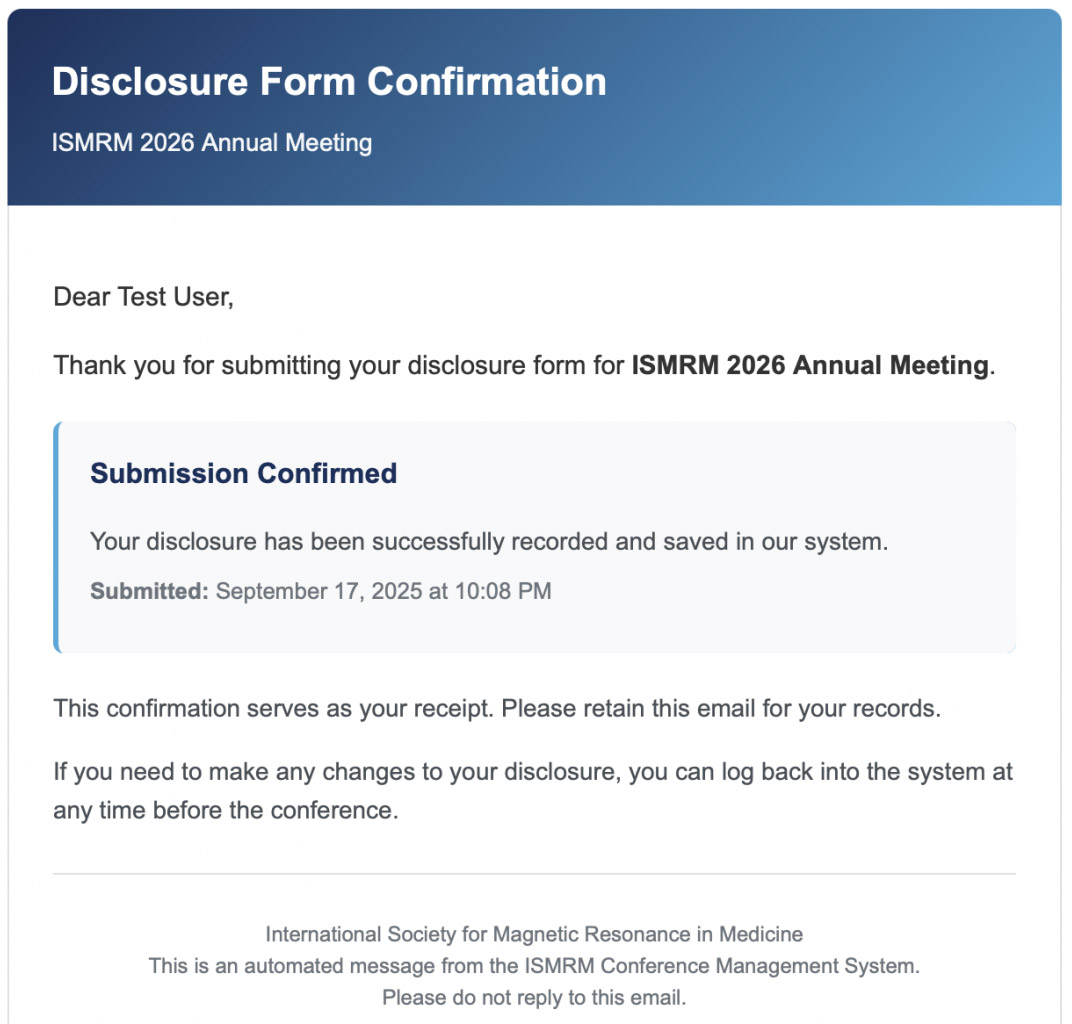
You should also receive an email confirmation that the form has been successfully submitted.
11. Sign Up To Be a Reviewer
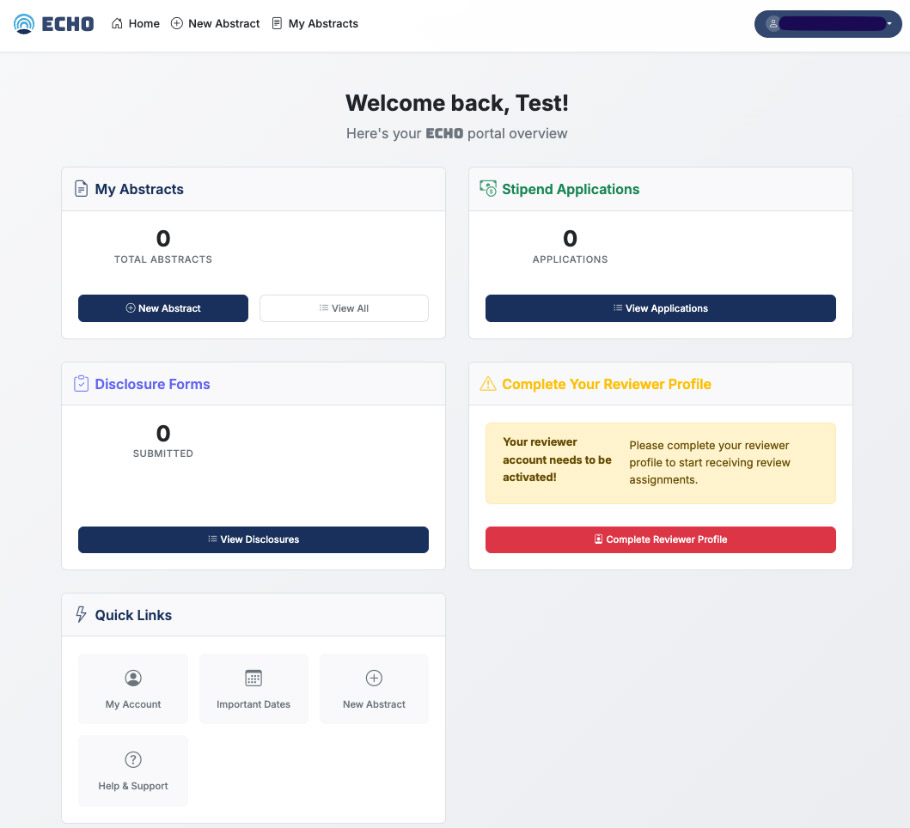
You can sign up to serve as an abstract reviewer from your ECHO homepage
From the homepage, you can access several opportunities, including applying for Stipends, if eligible, and signing up as a reviewer. We encourage you to volunteer as a reviewer for the Annual Meeting. Our volunteer reviewers play an important role in making the meeting possible.
Go to My Account.

Scroll to Reviewer Accounts, then select Express Interest in Reviewing.
Once you have volunteered, you should complete your reviewer profile by clicking the big, red reviewer profile button as shown here:
When you complete your Reviewer Profile, you will be asked to indicate your Expertise in different Skills. Please complete this as thoroughly as possible. The more complete your responses, the more likely you are to receive abstracts in your areas of expertise.
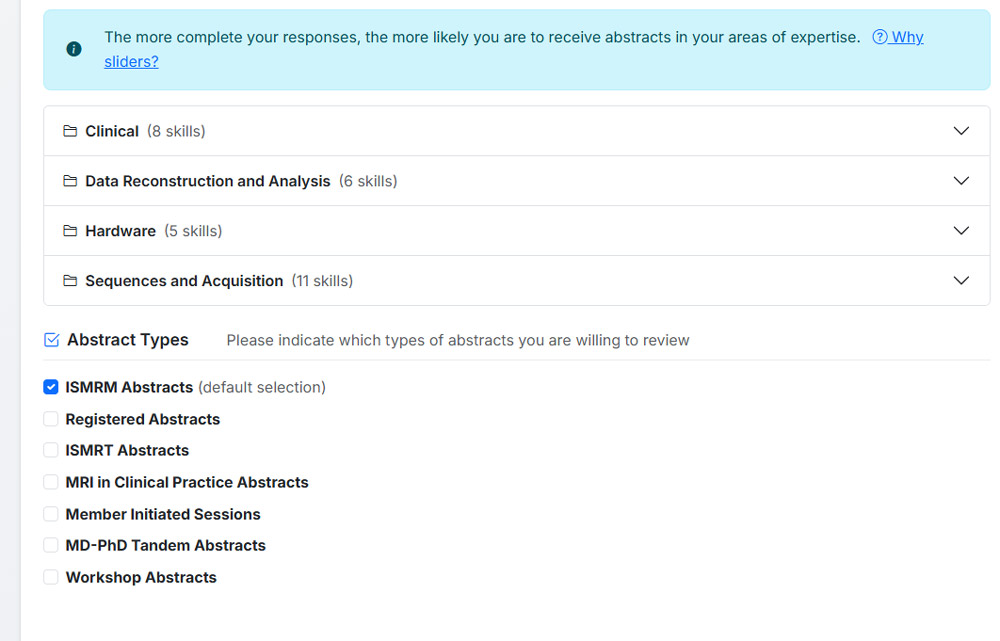
After completing your skills, please select the types of abstracts that you are willing to review.
Thank you taking part in this process!