
A Guide to ISMRT’s
New ECHO Abstract Submission Process
Register as a User
Step one is to register as a user. If you are already a registered user, skip ahead to step two.
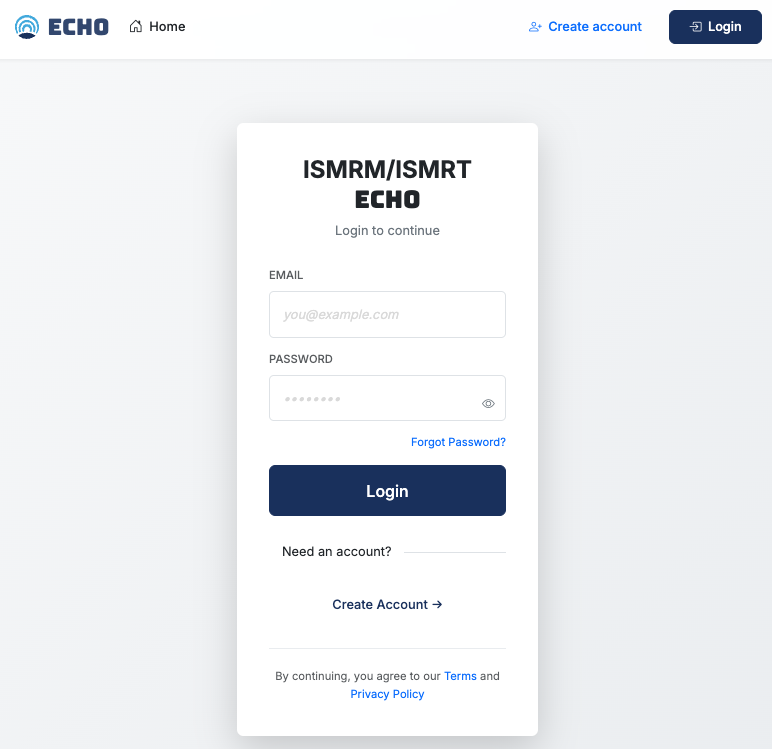
Navigate to echo.ismrm.org and select 'Create an Account.'
This user account will persist across years including workshops and annual meetings. It is possible to associate more than one email address with a user account.
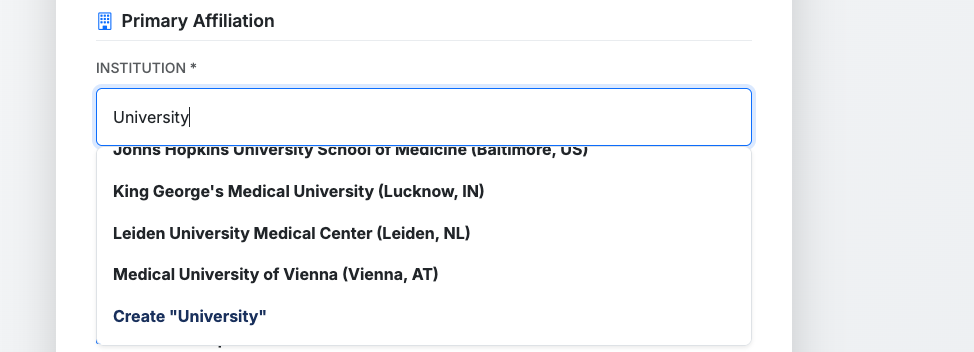
During account creation, you should enter your Primary Affiliation. If your Institution does not appear in the list, you can create it.
Once your registration is complete, please return to echo.ismrm.org and log in to the system to submit an abstract.
You only need to register for the ECHO system once. Please use the same user account for abstract submissions to future annual meetings.
Note: This account is not connected to your ISMRM/ISMRT membership account. You will be responsible for checking and updating your information each time you submit an abstract.
Submit an Abstract
At this point, we recommend that you write and organize your abstract in a common text editor without any formatting. Then, when you have your abstract ready, proceed with these directions.
Please note, ISMRT abstracts require that a CV be uploaded in the User profile. If you try to create an ISMRT abstract without a CV, you will be redirected to the User profile page to upload a CV. You must upload a CV to create an ISMRT abstract.
![]()
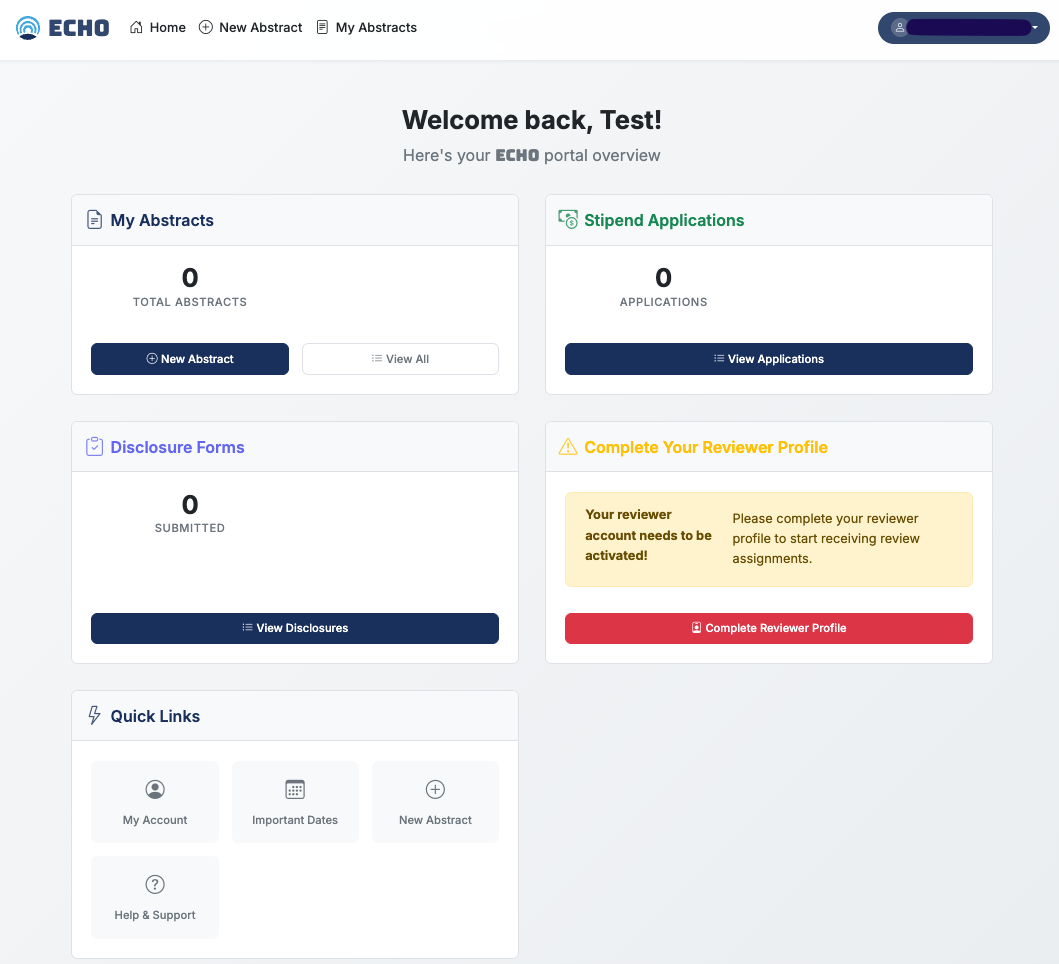
To submit an abstract, select 'New Abstract' under 'My Abstracts' on the Echo home page (when you are logged in to the system).
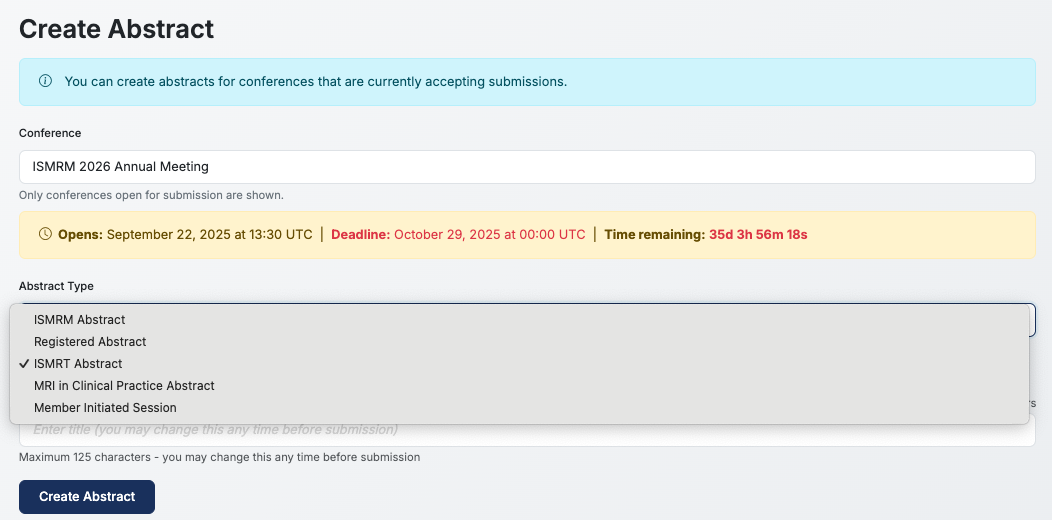
Here you can select the conference for abstract submission. In this case, select the Annual Meeting.

Then, select the abstract type that you would like to submit. Please select ISMRT Abstract.
Next, you will need to select the ISMRT Track for your submission, either Research or Clinical.

- Clinical Practice Focus: This category is for the presentation of work which demonstrates an improvement in patient care or diagnosis through the application of existing MR techniques. This is an opportunity to share your innovative ideas with your colleagues. The category does not require a formal study to have been undertaken.
- Research Focus: This category is for the presentation of work which describes novel or innovative MRI investigations or developments which have been tested by standard research methodology, i.e., a hypothesis is tested, results are obtained and analyzed and a conclusion is drawn as to whether or not the hypothesis was correct.
Enter your title and select 'Create Abstract'. You may update your title at any time prior to submission.
Create Your Abstract
On the Edit Abstract page you can revise your title and add the authors. Use the 'Add Author' button to add authors. When authors are added, you can use the buttons on the right side to rearrange the author order, edit an author's details, and delete an author. At this time, it is not possible to have joint first or last authors. Please indicate a Presenting Author who will be shown as the speaker in the conference program.
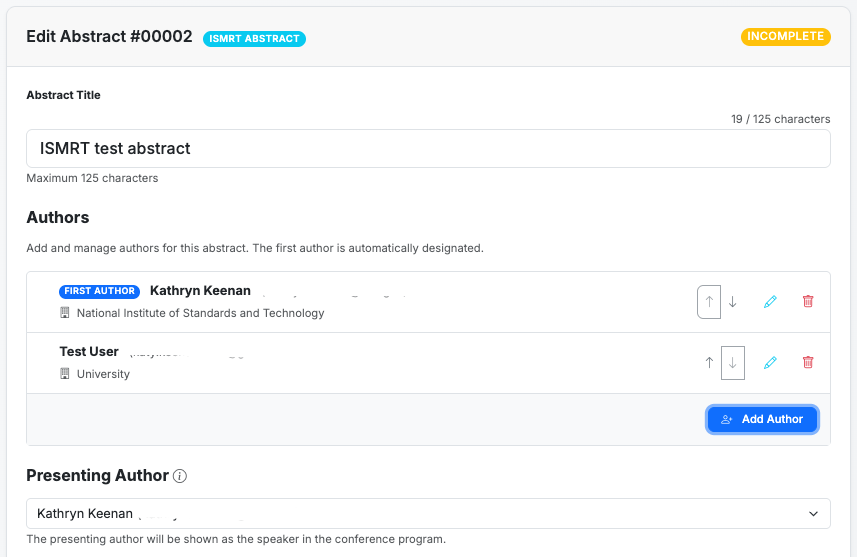
Please note, the system should automatically save your abstract as you work. You can also save your abstract at any time using the 'Save' button at the bottom of the page. At this point, we recommend that you save the abstract using the 'Save' button at the bottom of the page.
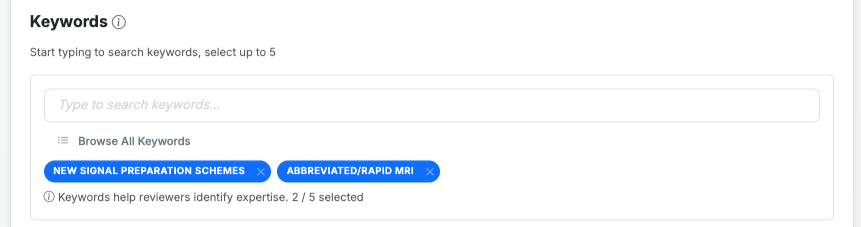
You may add up to five keywords. If your keyword is not supplied, you can add a keyword to the list. Keywords improve the ability to search the conference program and proceedings.
As in previous years, please add your Impact, Synopsis, and Abstract. The purpose of the abstract is to define the precise subject of the presentation to an audience. An abstract must contain sufficient information so that if published it would be a complete report independent of presentation. The text should not contain statements alluding to results or conclusions not presented within the text.
A properly submitted abstract will have the following suggested section titles:
Clinical Practice Focus
- Background
- Teaching Point
- Summary or Conclusions
- References
Research Focus
- Background or Purpose
- Methods
- Results
- Conclusions
- References
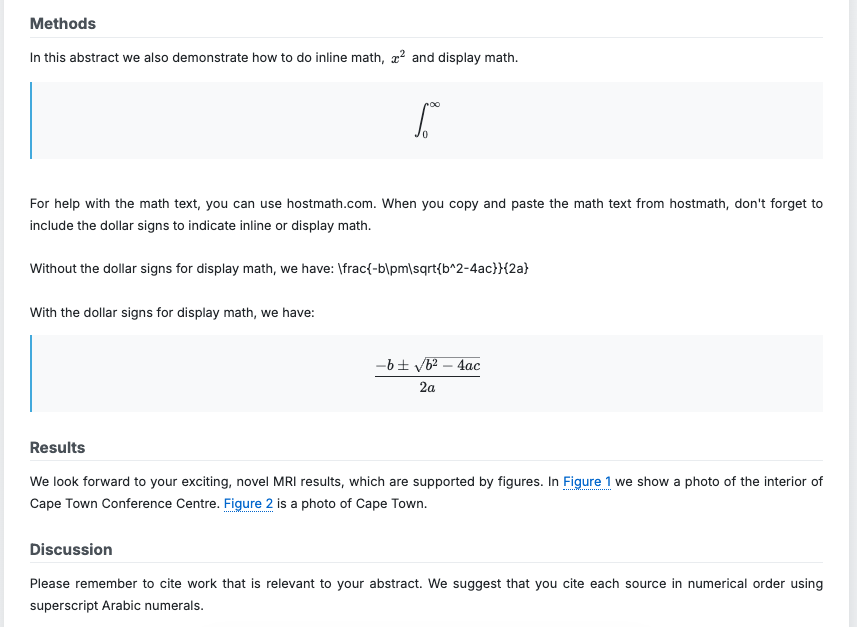
Math Text
Within the Content Sections, you can use both inline and display math. These tools can be used to create different type faces (e.g., bold and italics), subscripts, and superscripts. For help with the math text, you can use hostmath.com. When you copy and paste the math text from hostmath, don't forget to include the dollar signs to indicate inline ($[math type]$) or display math ($$[math type]$$). If you need to edit the inline or display math, click on the rendered inline or display math. If you would like to copy the math text, please click on the rendered inline or display math and copy when the text is in the $^$ format.
You can use the math text to create bold and italic text and the superscripts for references. Here is a quick guide:
Superscripts can be used for references $^{1,2,3}$ |
Superscripts can be used for references 1,2,3 |
Subscripts use underscore $T_1$. |
Subscripts use underscore Τ1. |
$\textbf{This makes bold font.}$ |
This makes bold font. |
$\textit{This makes italics.}$ |
This makes italics |
Including References
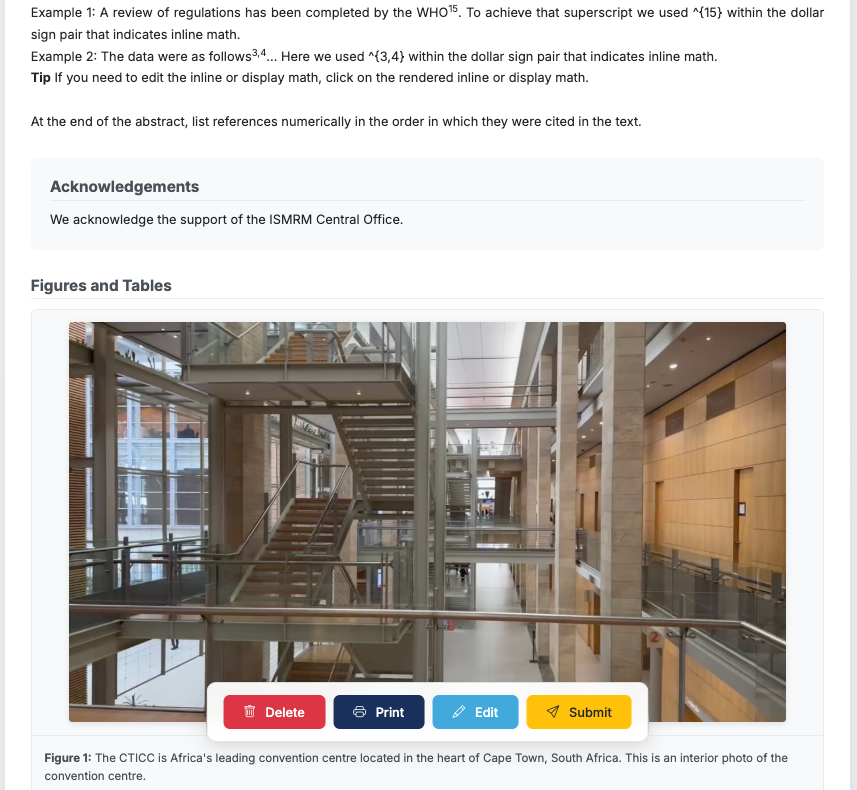
Following the Vancouver style of reference citation, we suggest that you number your references using Arabic numerals in the order of appearance in the abstract. You can include the references as superscripts using the [tool] or via superscripts with Math Text or via square brackets.

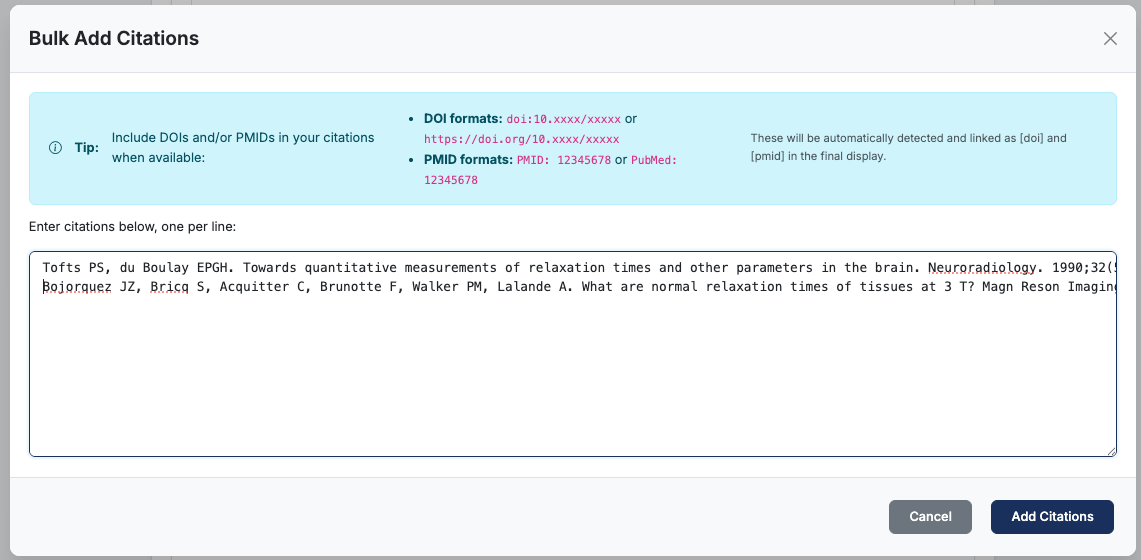
At the end of the abstract, list references numerically in the order in which they were cited in the text. You can add citations in bulk by listing one citation per line.
Citations can be added individually or in bulk. Please include DOIs and/or PMIDs in your citations when available.
DOI formats are doi:10.xxxx/xxxxx or https://doi.org/10.xxxx/xxxxx. PMID formats are PMID: 12345678 or PubMed: 12345678.
The citations are then listed individually, and if needed, you can rearrange or delete using the action buttons.
Adding Figures & Tables
To add Figures and Tables to your abstract, select Add Figure. Please note, Tables should be included as high-resolution image files.

Select the image file, which can include an animated figure. Please ensure that animated figures are silent/muted or do not contain audio.
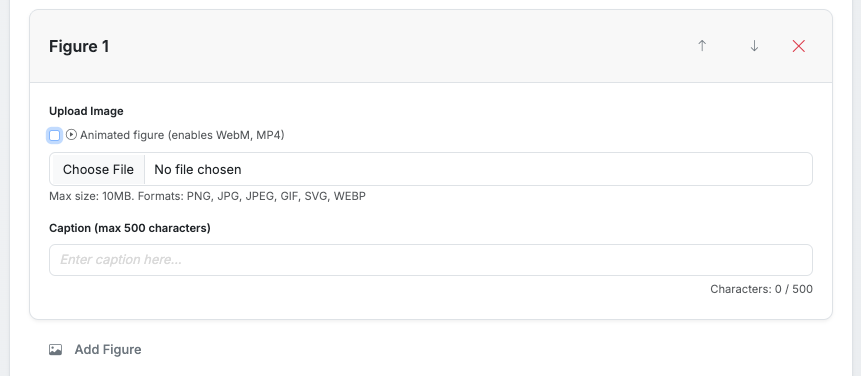
Figure captions are limited to 500 characters. The system automatically indicates the figure numbering when rendering and adds a hyperlink in the abstract text. You can use the buttons on the top right of the Figure menu to change the order of figures or remove a figure.
You can include an Acknowledgments section, which is not included in the Reviewer view of the abstract. The Acknowledgements section will be shown in the conference proceedings.
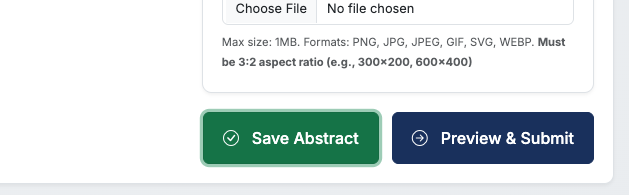
You are encouraged to upload Institutional or Project Logos and Preview Figures. The Preview Figure will be included in the conference program and will be visible to the public on session pages. This figure should be a simple representation of your work. The Institutional/Project Logos are limited to 1 MB and a maximum dimension of 300×300. The Preview Figures are limited to 1 MB and must be a 3:2 aspect ratio. These specifications are required for optimal view in the conference program. These figures are not included in the Reviewer view of the abstract.
Submitting Your Abstract
Once you have completed all sections of the Abstract, you are ready to ‘Preview & Submit.’
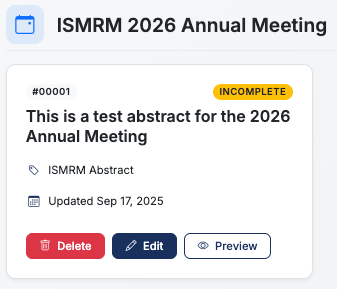
This takes you to the Abstract Review Before Submission. Please review the Checklist and read the Submission Rules carefully before submitting your abstract. Until you Submit your abstract, the status will be ‘Incomplete.’
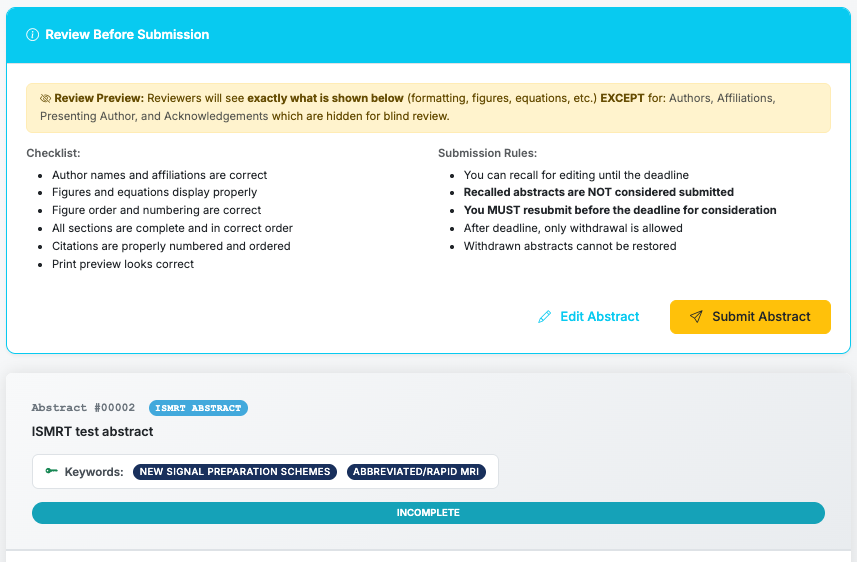

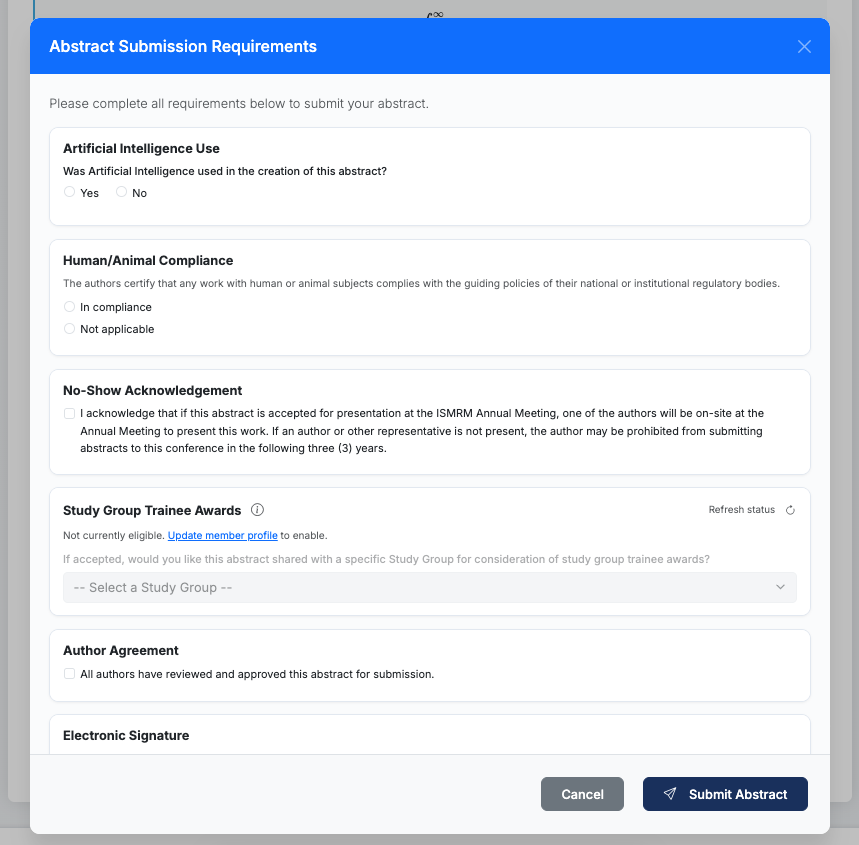
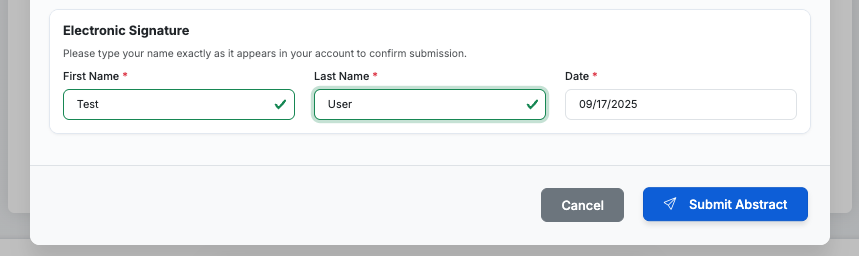
If you need to revise, you can return to edit your abstract by selecting the ‘Edit’ button. You can preview the pdf rendering of your abstract and save a copy by selecting the ‘Print’ button. When you are ready, select the ‘Submit’ button. Then, you will need to complete the Abstract Submission Requirements, including your electronic signature to submit your abstract.
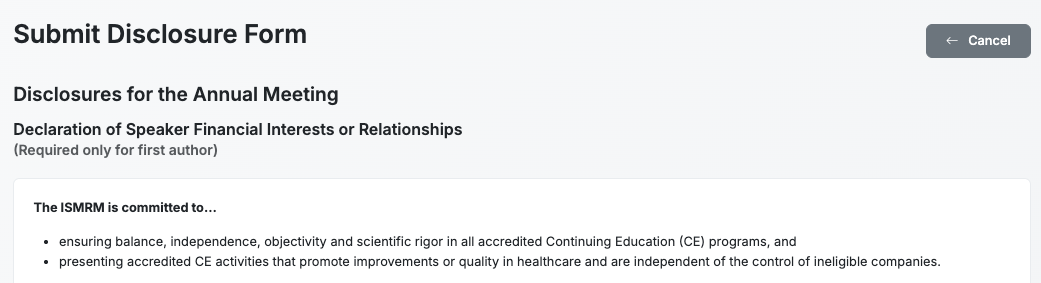
Upon submission of the abstract, a confirmation email is sent to the submitting author and all co-authors. Once you submit your abstract, you will be directed to complete your disclosures.
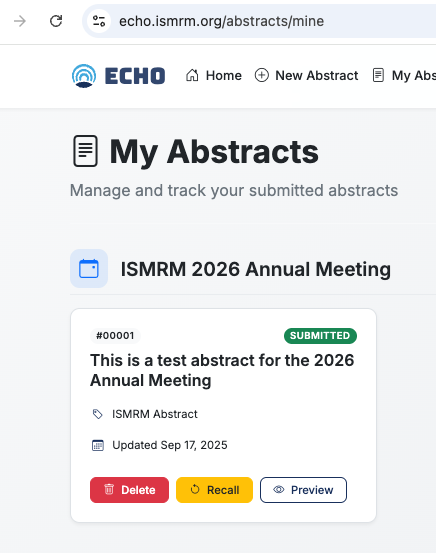
Abstract Recall
If needed, you can recall your abstract during the Abstract Submission window. Once Abstract Submission closes, you cannot Recall an abstract. You may Withdraw an abstract once Abstract Submission closes.
To Recall an abstract, navigate to ‘My Abstracts’ and select ‘Recall.’
The system will warn you about the actions of Recall. Your abstract will be reverted to incomplete status, and you WILL NEED TO SUBMIT IT AGAIN. The Recall process un-submits your abstract.
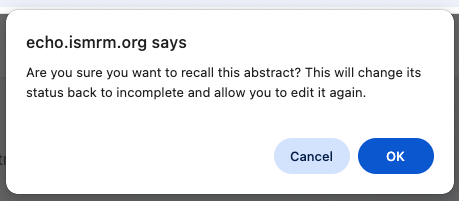
After selecting ‘OK’, you will select ‘Edit’ from the ‘My Abstracts’ page. Now you can edit your abstract. PLEASE REMEMBER TO SUBMIT THE ABSTRACT AGAIN.
Complete Your Disclosures
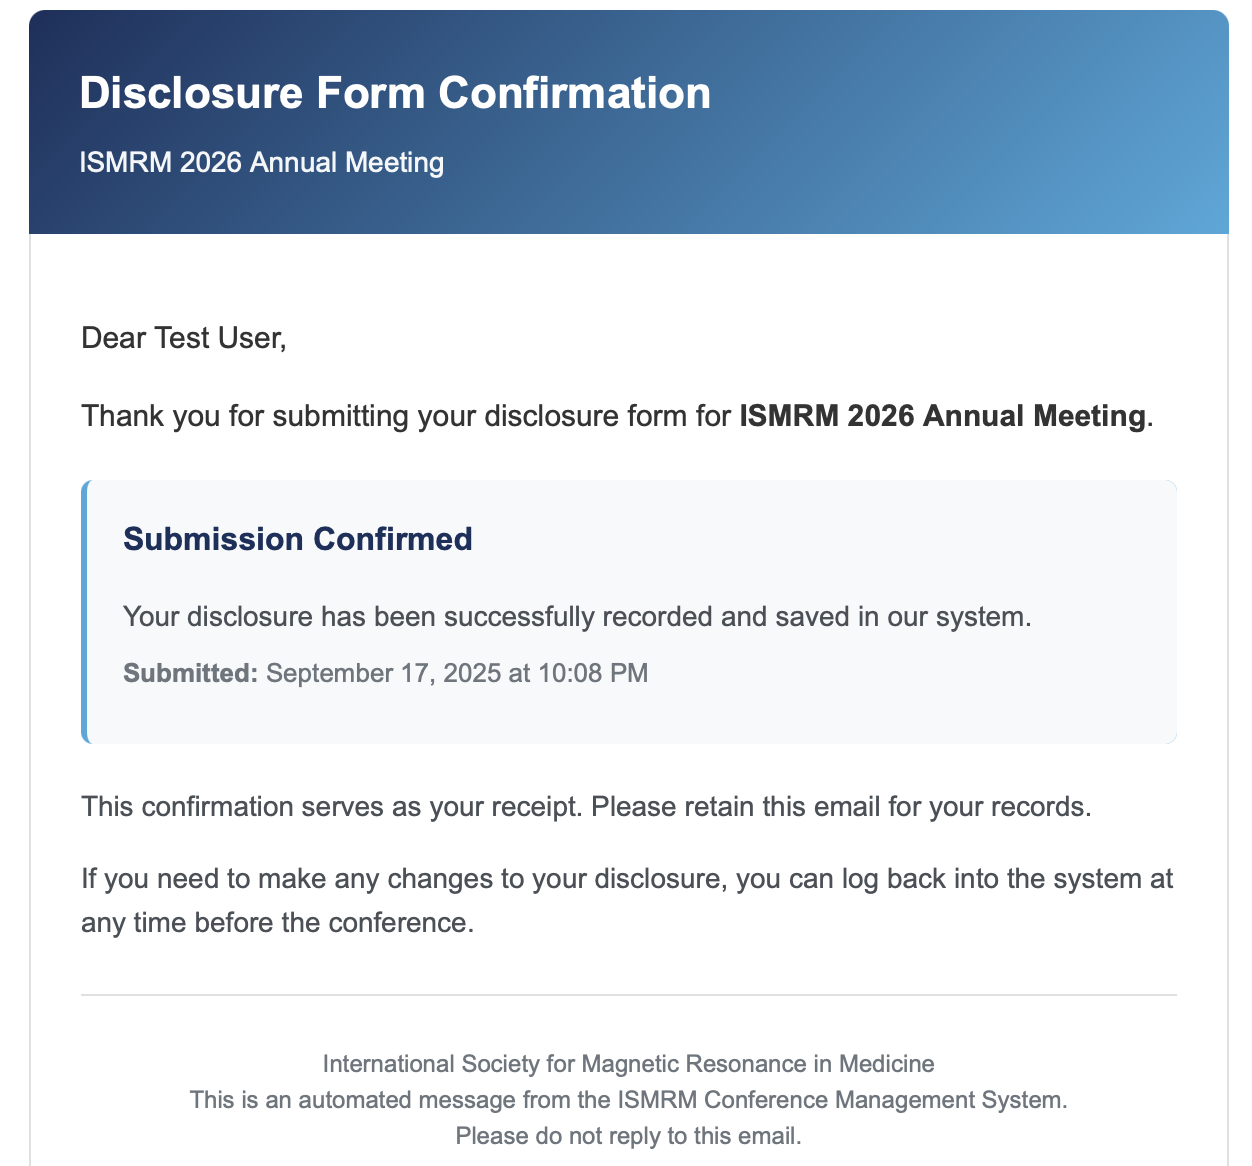
After submitting your abstract, you will be directed to complete your Disclosure Form. Please carefully read and complete the form.
At the end of the form you will need to complete your electronic signature.
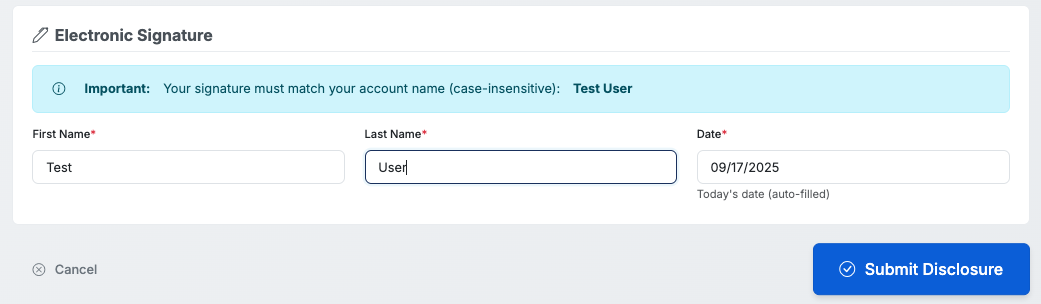
The completed form will display on your Disclosure Forms menu. You can Print the form to save it.

You should also receive an email confirmation that the form has been successfully submitted.
Thank you for signing up for ECHO, submitting an abstract, completing your disclosures, and signing up to review abstracts!